GoCardlessDeveloper Docs
Create a sandbox account

Verified Mandates#

View as Markdown

This guide shows how to create a Verified Mandate by creating a Billing Request which opts-into customer bank account verification, and sending the customer through a GoCardless hosted Billing Request Flow to complete the verification.

By verifying the customer has access to the bank account the Direct Debit mandate will be created against, you can protect yourself against fraudulent payers.

Before we begin: Availability and Preference#

Verified Mandates use different mechanisms depending on the scheme of the mandate in the Billing Request.

Here is a full list of supported Bank Debit schemes, whether a verification mechanism is available, and whether scheme compliance requires a customer to perform the verification.

SchemeAPIAvailableRequired by Scheme
πŸ‡ΊπŸ‡Έ ACHachYesNo
πŸ‡ΈπŸ‡ͺ AutogiroautogiroYesYes
πŸ‡¬πŸ‡§ BacsbacsYesNo
πŸ‡¦πŸ‡Ί BECSbecsNo-
πŸ‡³πŸ‡Ώ BECS NZbecs_nzNo-
πŸ‡©πŸ‡° BetalingsservicebetalingsserviceNo-
πŸ‡¨πŸ‡¦ PADpadNo-
πŸ‡ͺπŸ‡Ί SEPA Coresepa_coreGermany πŸ‡©πŸ‡ͺ, France πŸ‡«πŸ‡·No

To request verification for your mandate, you must set the verify attribute of the mandate_request to a level that matches your preference.

Verification preference can be one of:

  • minimum: only verify if absolutely required, such as when part of scheme rules
  • recommended: in addition to minimum, use Protect+ to decide if a payer should be verified
  • when_available: if verification mechanisms are available, use them
  • always: as when_available, but fail to create the Billing Request if a mechanism isn't available

By default, all Billing Requests use the recommended verification preference. It uses Protect+ to determine if a payer is fraudulent or not. The verification mechanism is based on the response and the payer may be asked to verify themselves. If the feature is not available, recommended behaves like minimum.

If you never wish to take advantage of Protect+ and Verified Mandates as they are released in new schemes, please use the minimum verification preference.

How-to#

In this how-to, we'll opt for when_available to ensure we apply the verification if the scheme supports it. And as per our availability, we'll be creating a bacs mandate, as that scheme supports verification.

Let's begin!

Create a Billing Request#

Use the Create a Billing Request endpoint:

POST https://api.gocardless.com/billing_requests HTTP/1.1
{
  "billing_requests": {
    "mandate_request": {
      "scheme": "bacs",
      "verify": "when_available"
    }
  }
}
$client = new \GoCardlessPro\Client(array(
  'access_token' => 'your_access_token_here',
  'environment'  => \GoCardlessPro\Environment::SANDBOX
));
 
$client->billingRequests()->create([
  "params" => [
    "mandate_request" => [
      "scheme" => "bacs",
      "verify" => "when_available"
    ]
  ]
]);
import gocardless_pro
client = gocardless_pro.Client(access_token="your_access_token_here", environment='sandbox')
 
client.billing_requests.create(params={
  "mandate_request": {
    "scheme": "bacs",
    "verify": "when_available"
  }
})
@client = GoCardlessPro::Client.new(
  access_token: "your_access_token",
  environment: :sandbox
)
 
@client.billing_requests.create(
  params: {
    mandate_request: {
      scheme: "bacs",
      verify: "when_available"
    }
  }
)
import static com.gocardless.GoCardlessClient.Environment.SANDBOX;
String accessToken = "your_access_token_here";
GoCardlessClient client = GoCardlessClient
    .newBuilder(accessToken)
    .withEnvironment(SANDBOX)
    .build();
 
BillingRequest billingRequest = client.billingRequests().create()
  .withMandateRequestScheme("bacs")
  .withMandateRequestVerify("when_available")
  .execute();
const constants = require("gocardless-nodejs/constants");
const gocardless = require("gocardless-nodejs");
const client = gocardless("your_access_token_here", constants.Environments.Sandbox);
 
const billingRequest = await client.billingRequests.create({
  mandate_request: {
    scheme: "bacs",
    verify: "when_available",
  },
});
String accessToken = "your_access_token";
GoCardlessClient gocardless = GoCardlessClient.Create(accessToken, Environment.SANDBOX);
 
var mandateRequest = new GoCardless.Services.BillingRequestCreateRequest.BillingRequestMandateRequest
{
  Scheme = "bacs",
  Verify = "when_available"
};
 
var resp = await gocardless.BillingRequests.CreateAsync(
  new GoCardless.Services.BillingRequestCreateRequest()
  {
    MandateRequest = mandateRequest,
  }
);
 
GoCardless.Resources.BillingRequest billingRequest = resp.BillingRequest;
package main
 
import (
	gocardless "github.com/gocardless/gocardless-pro-go/v6"
)
 
accessToken := "your_access_token_here"
opts := gocardless.WithEndpoint(gocardless.SandboxEndpoint)
config, err := gocardless.NewConfig(accessToken, opts)
if err != nil {
	fmt.Printf("got err in initialising config: %s", err.Error())
	return
}
client, err := gocardless.New(config)
if err != nil {
	fmt.Println("error in initialisating client: %s", err.Error())
	return
}
 
billingRequestCreateParams := gocardless.BillingRequestCreateParams{
	MandateRequest: &gocardless.BillingRequestCreateParamsMandateRequest{
		Scheme: "bacs",
		Verify: "when_available",
	},
}
 
billingRequest, err := client.BillingRequests.Create(context, billingRequestCreateParams)
gc create billing_request \
  -d 'mandate_request[scheme]=bacs' \
  -d 'mandate_request[verify]=when_available'

This will create a new Billing Request, asking for a Bacs mandate and requesting a when_available verification preference.

The response will look like this:

{
  "billing_requests": {
    "id": "BRQ123",
    "status": "pending",
    "mandate_request": {
      "currency": "GBP",
      "scheme": "bacs",
      "verify": "when_available"
    },
    "actions": [
      {
        "type": "bank_authorisation",
        "required": true,
        "status": "pending"
      }
    ]
  }
}

As Bacs supports verification, you'll see we have a bank_authorisation action in the Billing Request response. Note the action is required, which means we cannot fulfil this request without first completing the bank authorisation.

We can use Billing Request Flows to generate a checkout flow that guides the payer through these actions, including the verification via bank authorisation.

Create a Billing Request Flow#

Billing Request Flows can be created against Billing Requests, and provide an entry into a hosted GoCardless flow that completes whatever actions remain against the request.

Create a Billing Request Flow to retrieve a link that can be provided to your customer to complete the request:

POST https://api.gocardless.com/billing_request_flows HTTP/1.1
{
  "billing_request_flows": {
    "redirect_uri": "https://my-company.com/landing",
    "exit_uri": "https://my-company.com/exit",
    "links": {
      "billing_request": "BRQ000010NMDMH2"
    }
  }
}
$client = new \GoCardlessPro\Client(array(
  'access_token' => 'your_access_token_here',
  'environment'  => \GoCardlessPro\Environment::SANDBOX
));
 
$client->billingRequestFlows()->create([
  "params" => [
    "redirect_uri" => "https://my-company.com/landing",
    "exit_uri" => "https://my-company.com/exit",
    "links" => [
      "billing_request" => "BRQ000010NMDMH2"
    ]
  ]
]);
import gocardless_pro
client = gocardless_pro.Client(access_token="your_access_token_here", environment='sandbox')
 
client.billing_request_flows.create(params={
  "redirect_uri": "https://my-company.com/landing",
  "exit_uri": "https://my-company.com/exit",
  "links": {
    "billing_request": "BRQ000010NMDMH2"
  }
})
@client = GoCardlessPro::Client.new(
  access_token: "your_access_token",
  environment: :sandbox
)
 
@client.billing_request_flows.create(
  params: {
    redirect_uri: "https://my-company.com/landing",
    exit_uri: "https://my-company.com/exit",
    links: {
      billing_request: "BRQ000010NMDMH2",
    }
  }
)
import static com.gocardless.GoCardlessClient.Environment.SANDBOX;
String accessToken = "your_access_token_here";
GoCardlessClient client = GoCardlessClient
    .newBuilder(accessToken)
    .withEnvironment(SANDBOX)
    .build();
 
BillingRequestFlow billingRequestFlow = client.billingRequestFlows().create()
  .withRedirectUri("https://my-company.com/landing")
  .withExitUri("https://my-company.com/exit")
  .withLinksBillingRequest("BRQ000010NMDMH2")
  .execute();
const constants = require("gocardless-nodejs/constants");
const gocardless = require("gocardless-nodejs");
const client = gocardless("your_access_token_here", constants.Environments.Sandbox);
 
const billingRequestFlow = await client.billingRequestFlows.create({
  redirect_uri: "https://my-company.com/landing",
  exit_uri: "https://my-company.com/exit",
  links: {
    billing_request: "BRQ000010NMDMH2",
  },
});
String accessToken = "your_access_token";
GoCardlessClient gocardless = GoCardlessClient.Create(accessToken, Environment.SANDBOX);
 
var resp = await gocardless.BillingRequestFlows.CreateAsync(
  new GoCardless.Services.BillingRequestFlowCreateRequest()
  {
    RedirectUri = "https://my-company.com/landing",
    ExitUri = "https://my-company.com/exit",
    Links = new GoCardless.Services.BillingRequestFlowCreateRequest.BillingRequestFlowLinks {
      BillingRequest = "BRQ000010NMDMH2",
    },
  }
);
 
GoCardless.Resources.BillingRequestFlow billingRequestFlow = resp.BillingRequestFlow;
package main
 
import (
	gocardless "github.com/gocardless/gocardless-pro-go/v6"
)
 
accessToken := "your_access_token_here";
opts := gocardless.WithEndpoint(gocardless.SandboxEndpoint)
client, err := gocardless.New(accessToken, opts)
 
billingRequestFlowCreateParams := gocardless.BillingRequestFlowCreateParams{}
billingRequestFlowCreateParams.RedirectUri = "https://my-company.com/landing"
billingRequestFlowCreateParams.ExitUri = "https://my-company.com/exit"
billingRequestFlowCreateParams.Links.BillingRequest = "BRQ000010NMDMH2"
billingRequestFlow, err := client.BillingRequestFlows.Create(context, billingRequestFlowCreateParams)
gc create billing_request_flow \
  -d "links[billing_request]= BRQ000010NMDMH2" \
  -d 'redirect_uri=https://my-company.com/landing' \
  -d 'exit_uri=https://my-company.com/exit'

This returns a new flow, which has an authorisation_url you should send to your customer:

{
  "billing_request_flows": {
    "authorisation_url": "https://pay.gocardless.com/billing/static/flow?id=<brf_id>",
    "lock_customer_details": false,
    "lock_bank_account": false,
    "auto_fulfil": true,
    "created_at": "2021-03-30T16:23:10.679Z",
    "expires_at": "2021-04-06T16:23:10.679Z",
    "redirect_uri": "https://my-company.com/completed",
    "links": {
      "billing_request": "BRQ123"
    }
  }
}

Share your authorisation link from the response in Step 2, via a button on your website, SMS, email, or any other way you like.

Preview what your customer will see by following the steps below.

What the customer will see#

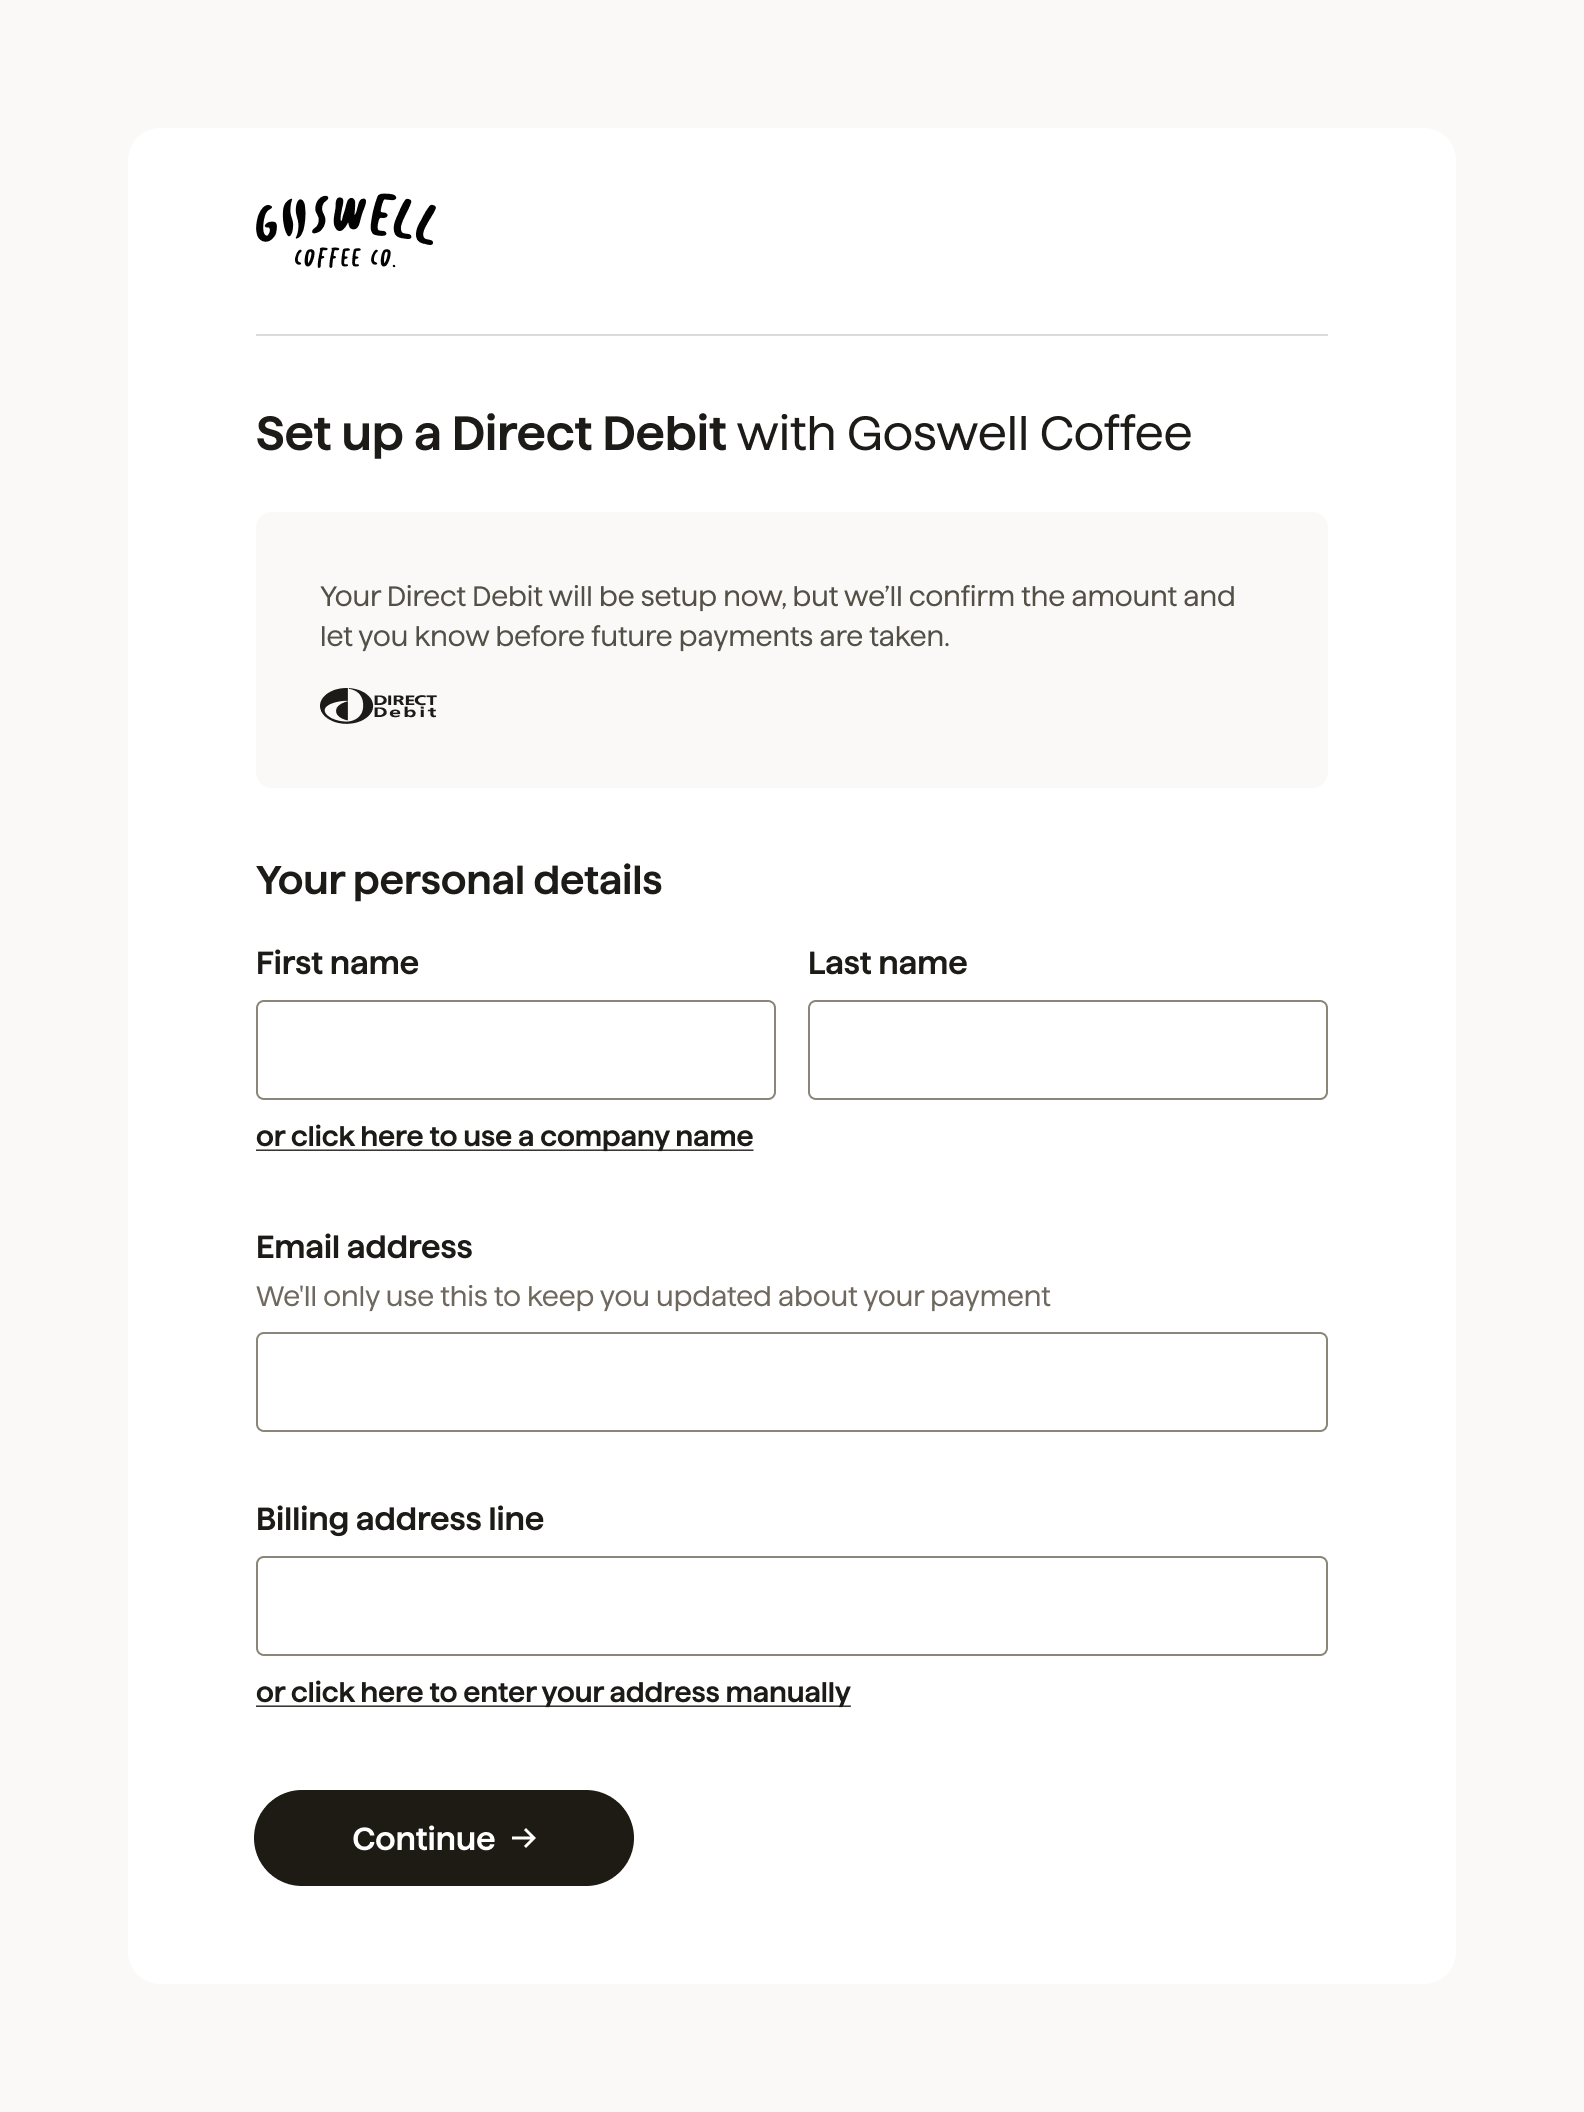
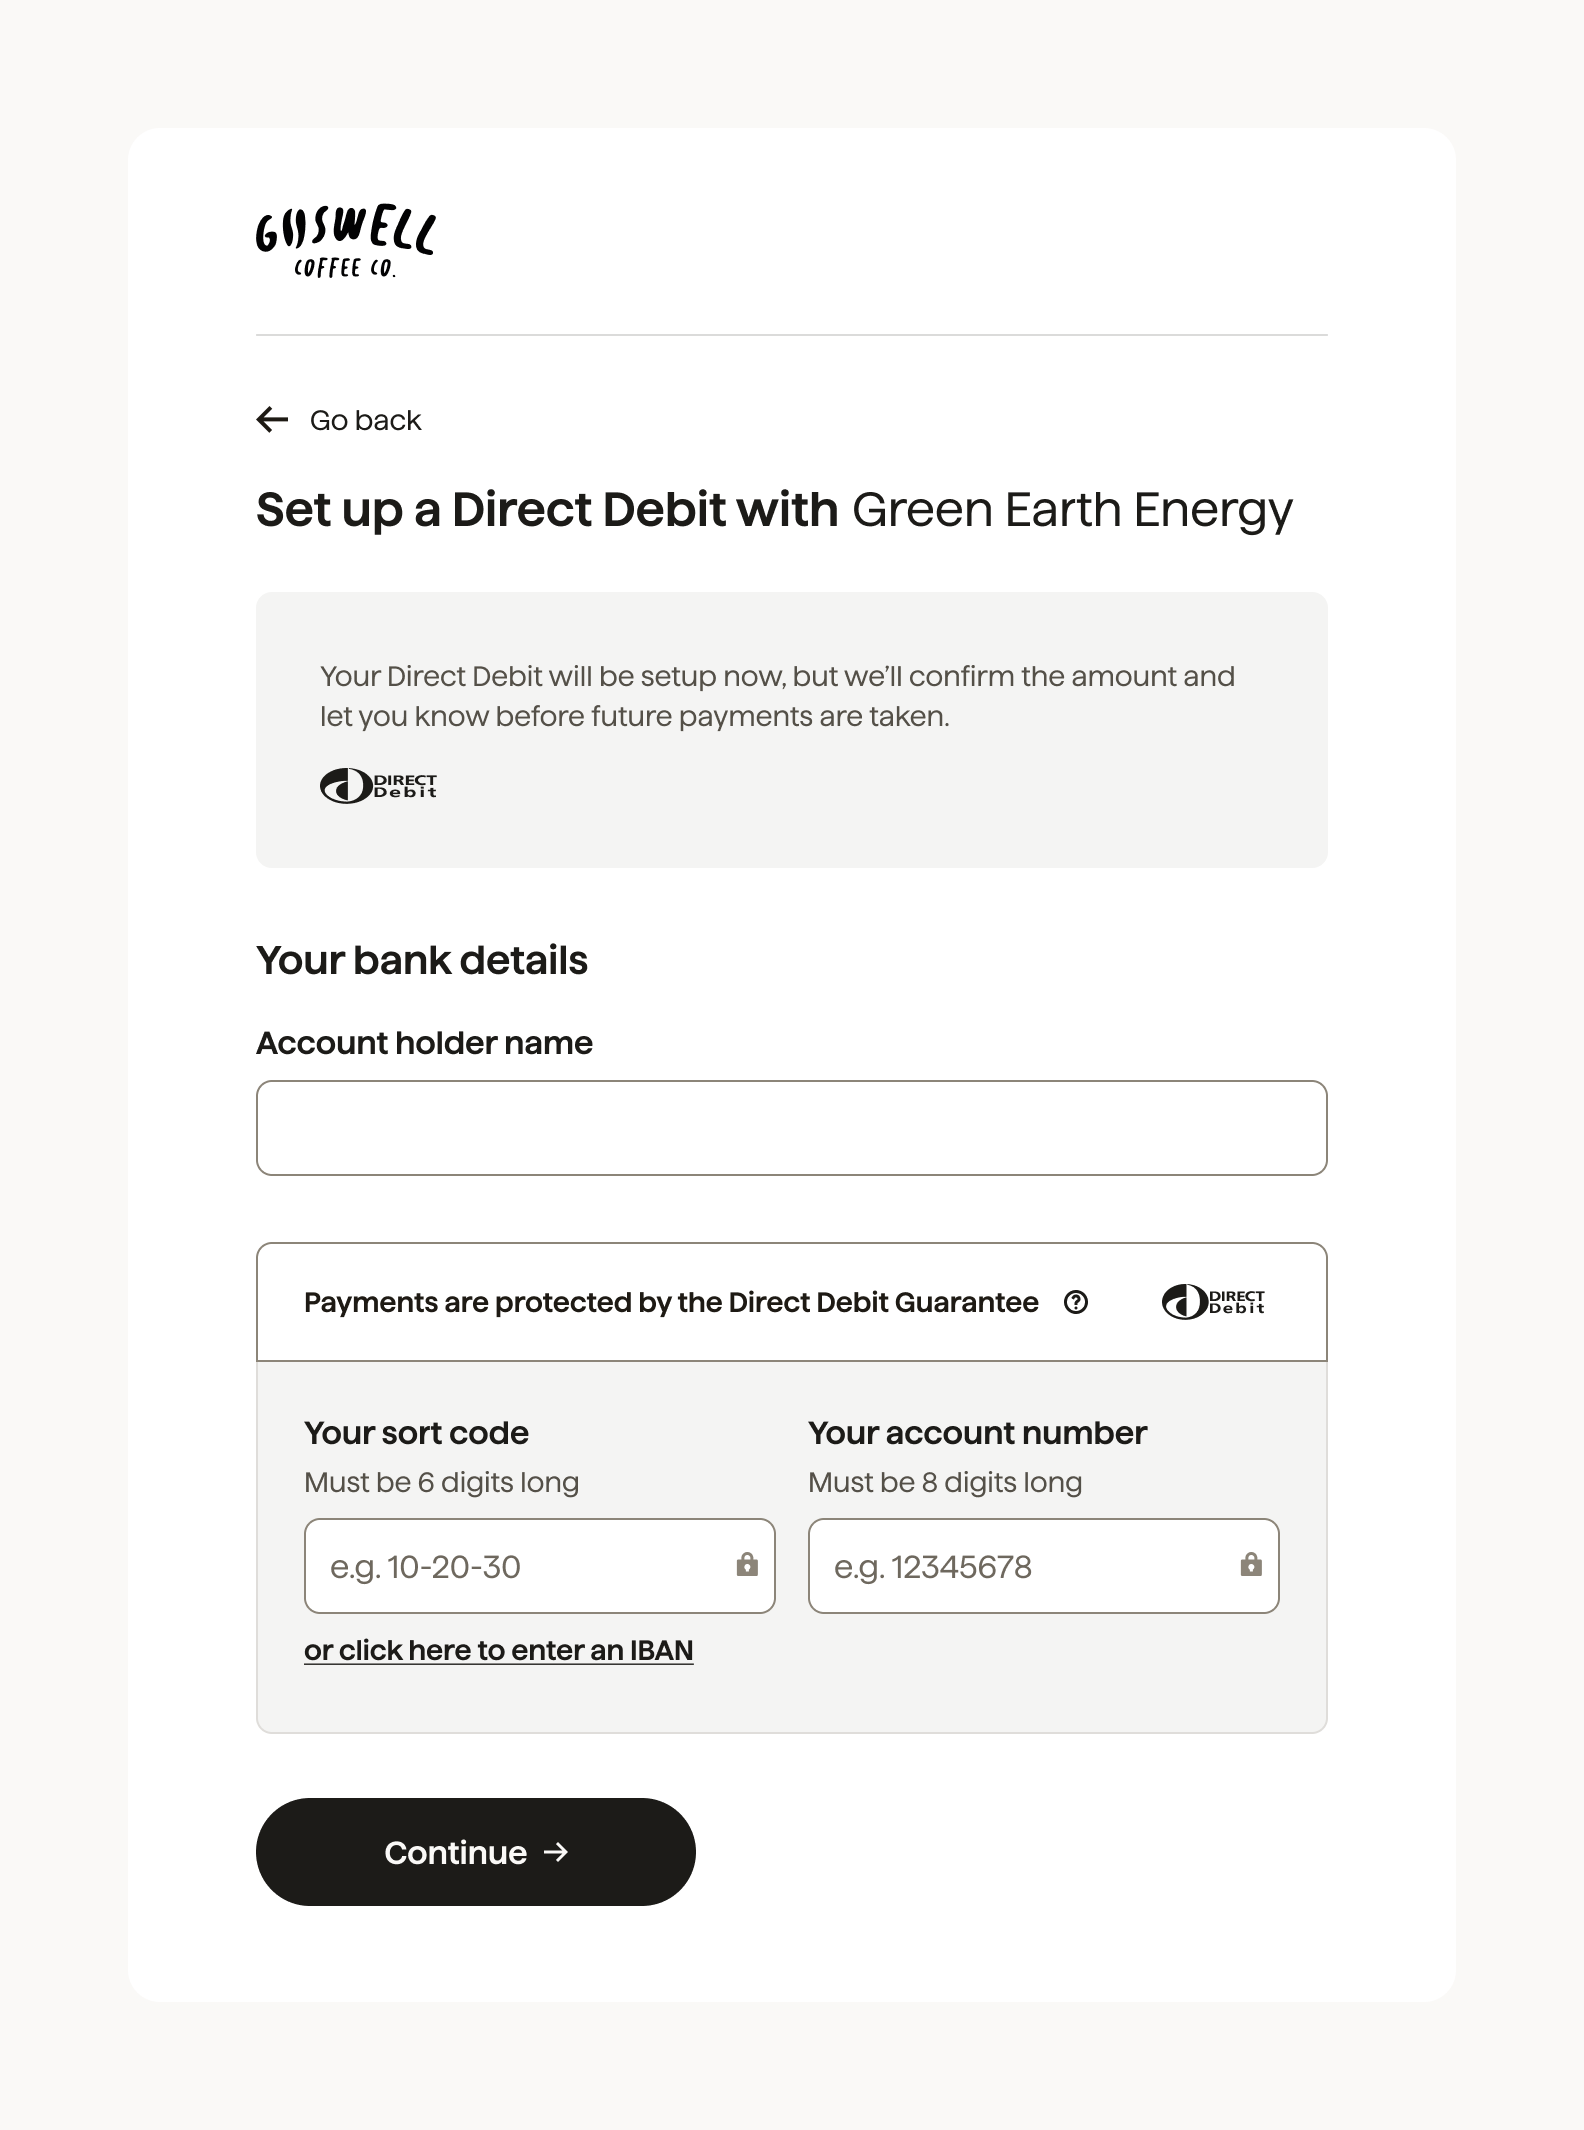
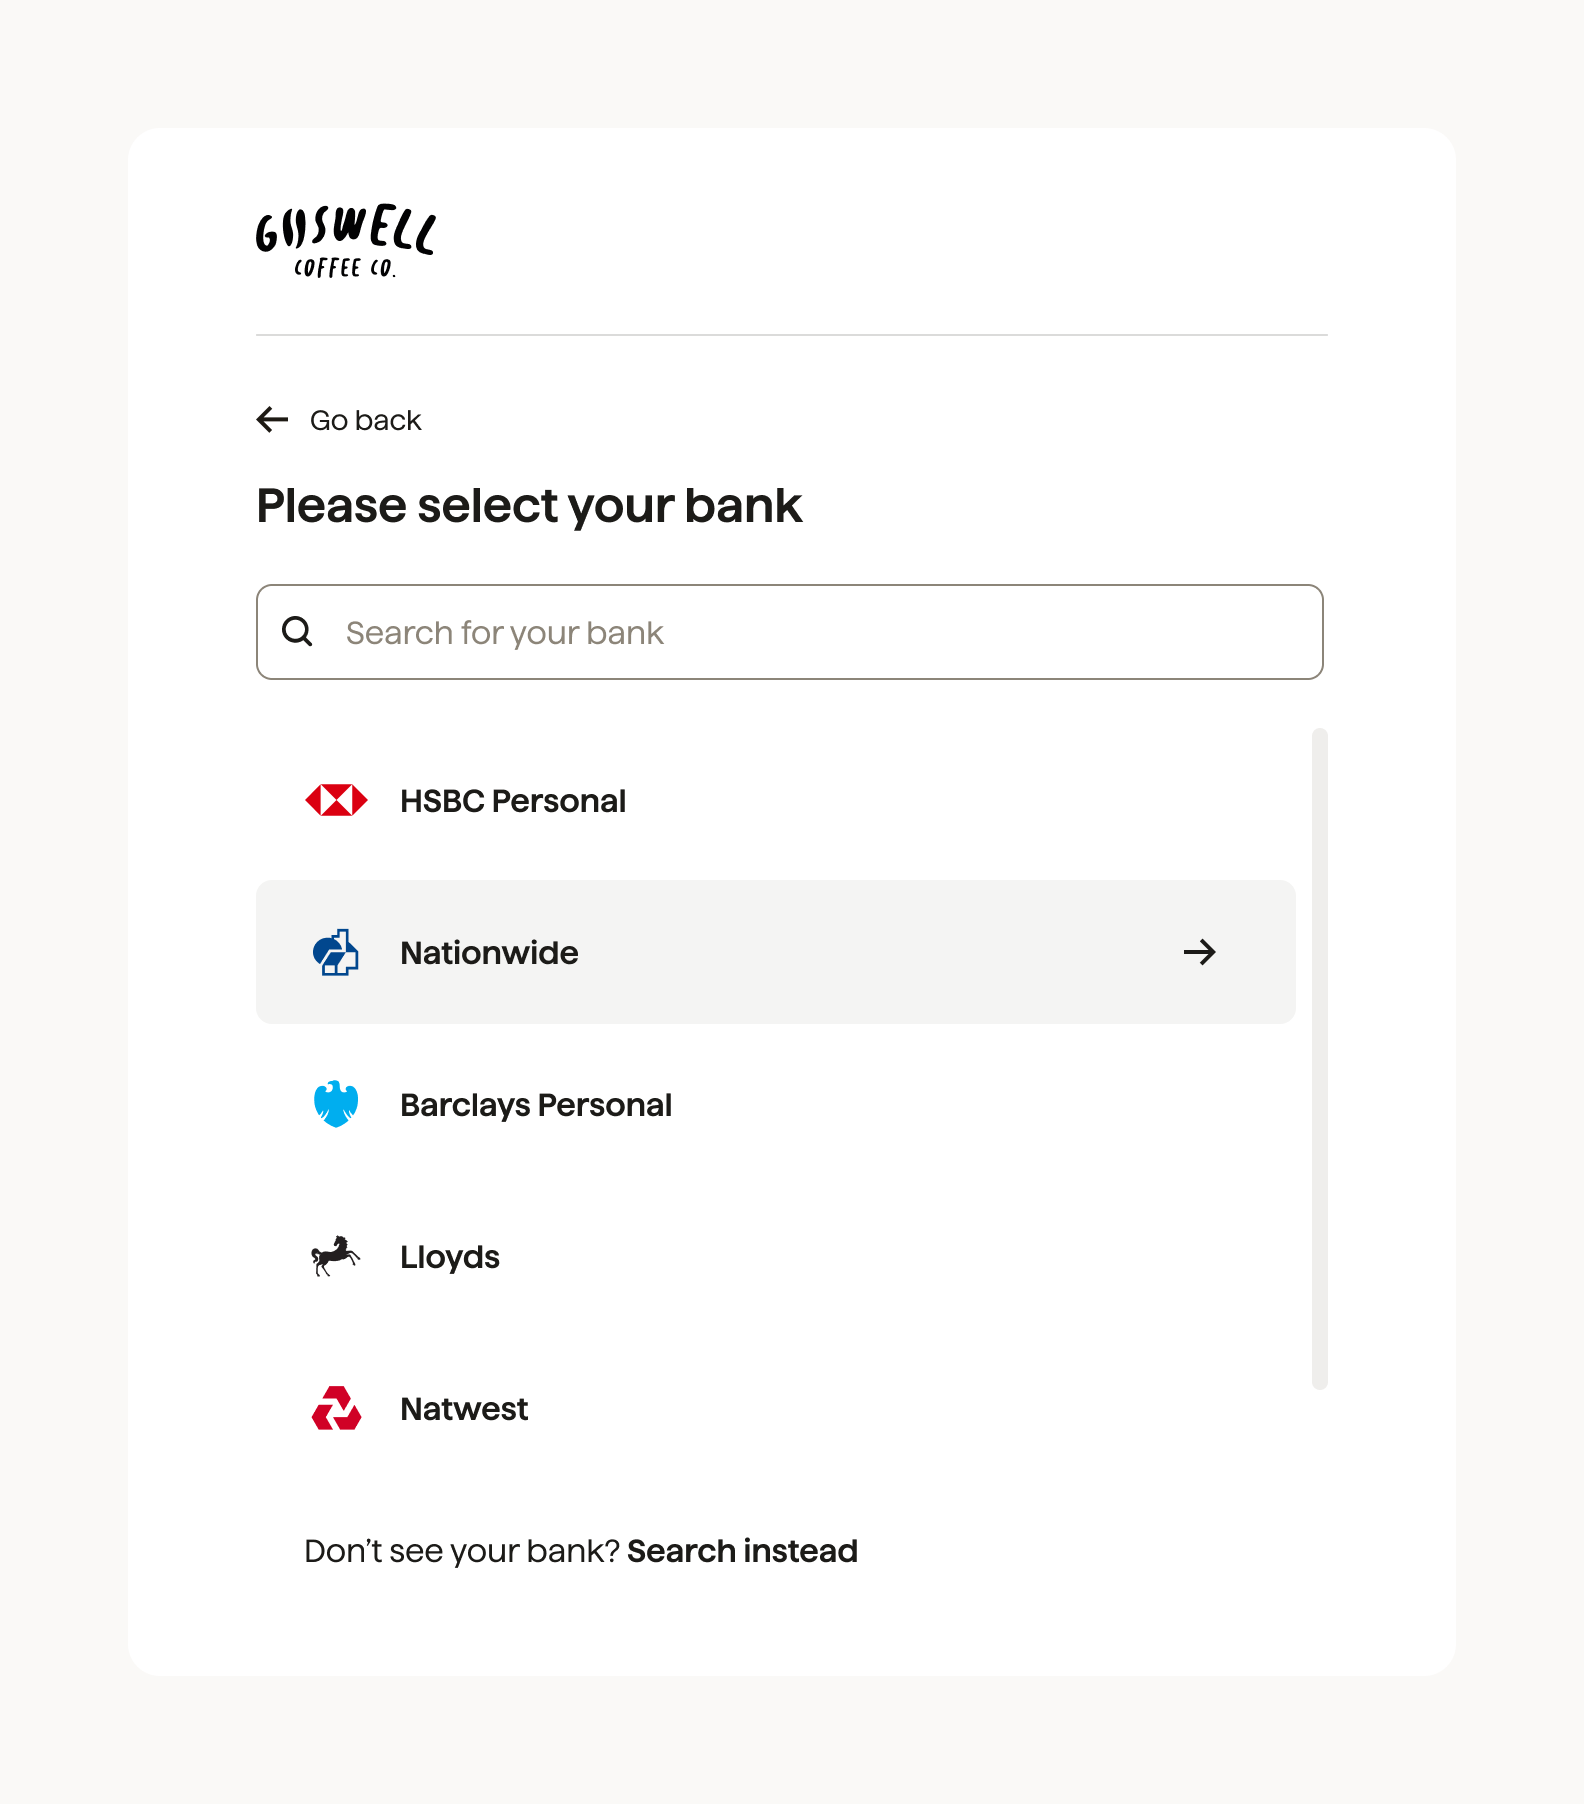
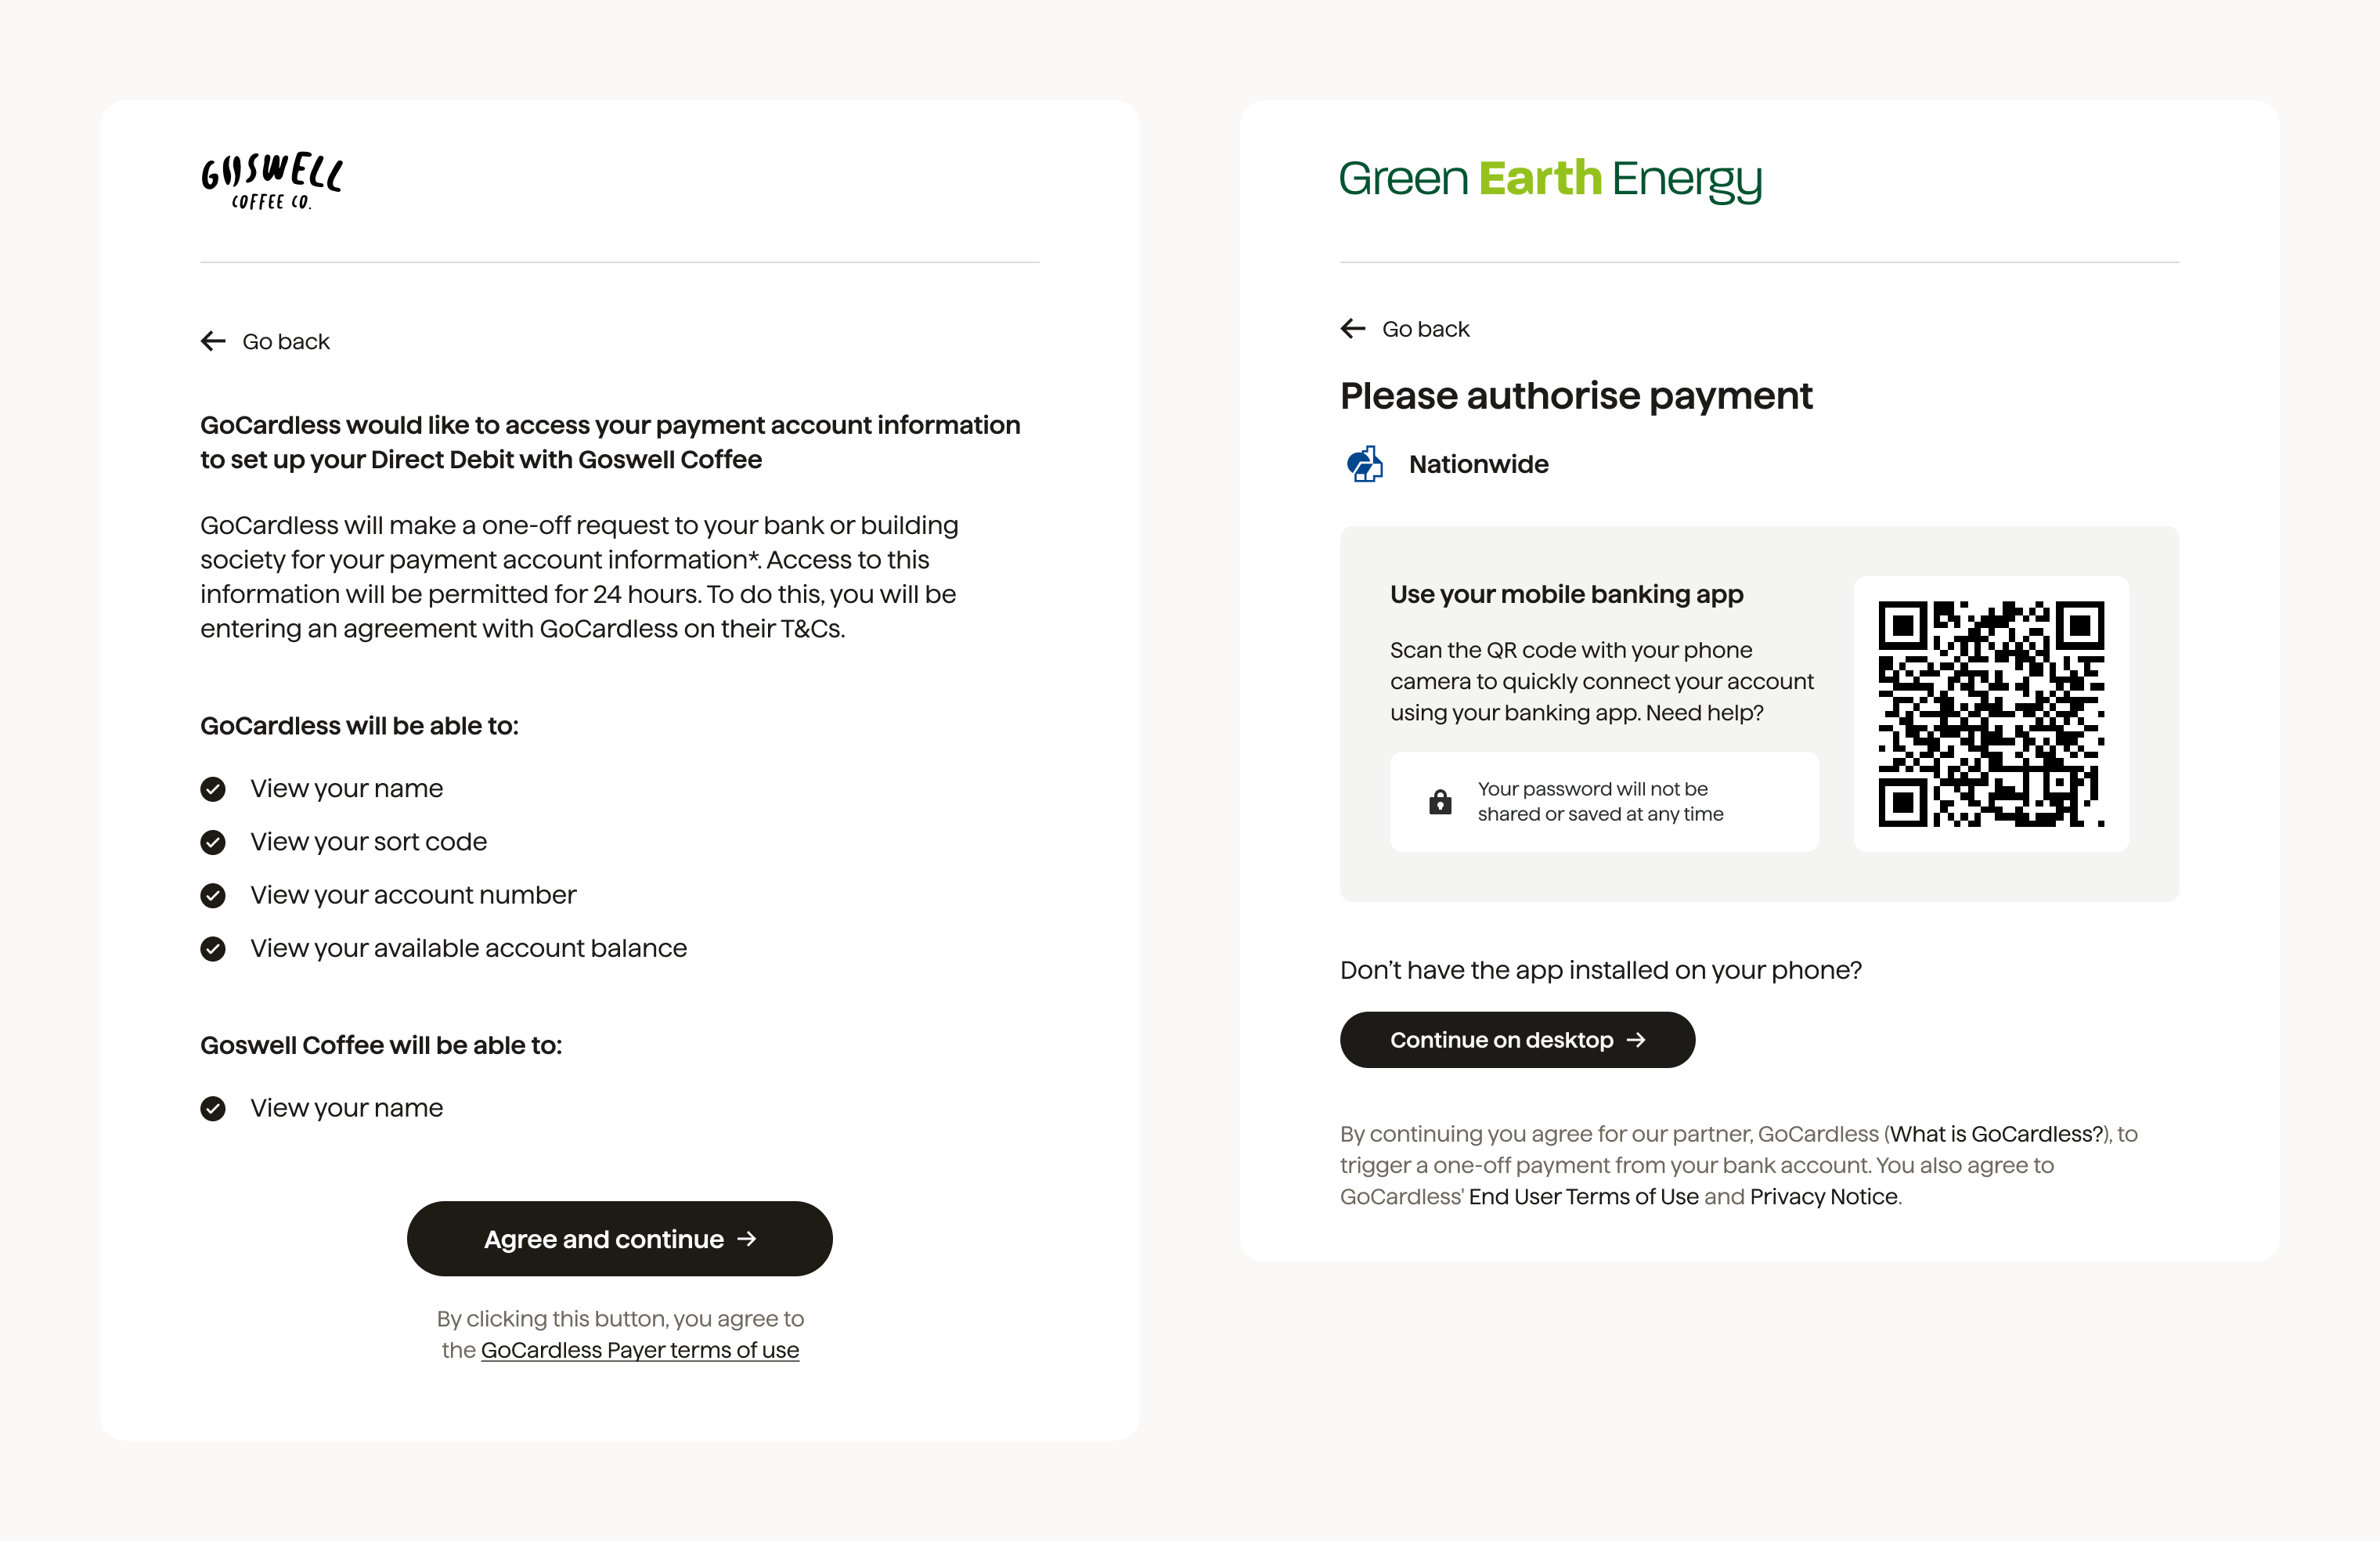
When the customer opens the authorisation link, they'll see a form that goes through the following steps. The example is shown for the πŸ‡¬πŸ‡§ Bacs scheme.

Choose currency

Note: This portion of the screen will only be visible if the organisation accepts multiple currencies.

Choose a currency to change the currency and scheme for the billing request.

currency selector screenshot

Collect customer details

Note: This screen is skipped if the details already exist, or the customer details have been locked.

Collect customer details in order to complete the billing request.

bacs-01-customer-details

Collect bank details

Optional step: This step is only required when verify is set to recommended or minimum.

Collect customer bank account details in order to complete the billing request.

bacs-01b-bank-details

Select bank

Optional step: This step is required only when verify is set to always or when_available. It is sometimes required in supported schemes when using Protect+ upgrade and the recommended option.

Select bank in order to complete the billing request.

bacs-01c-bank-select

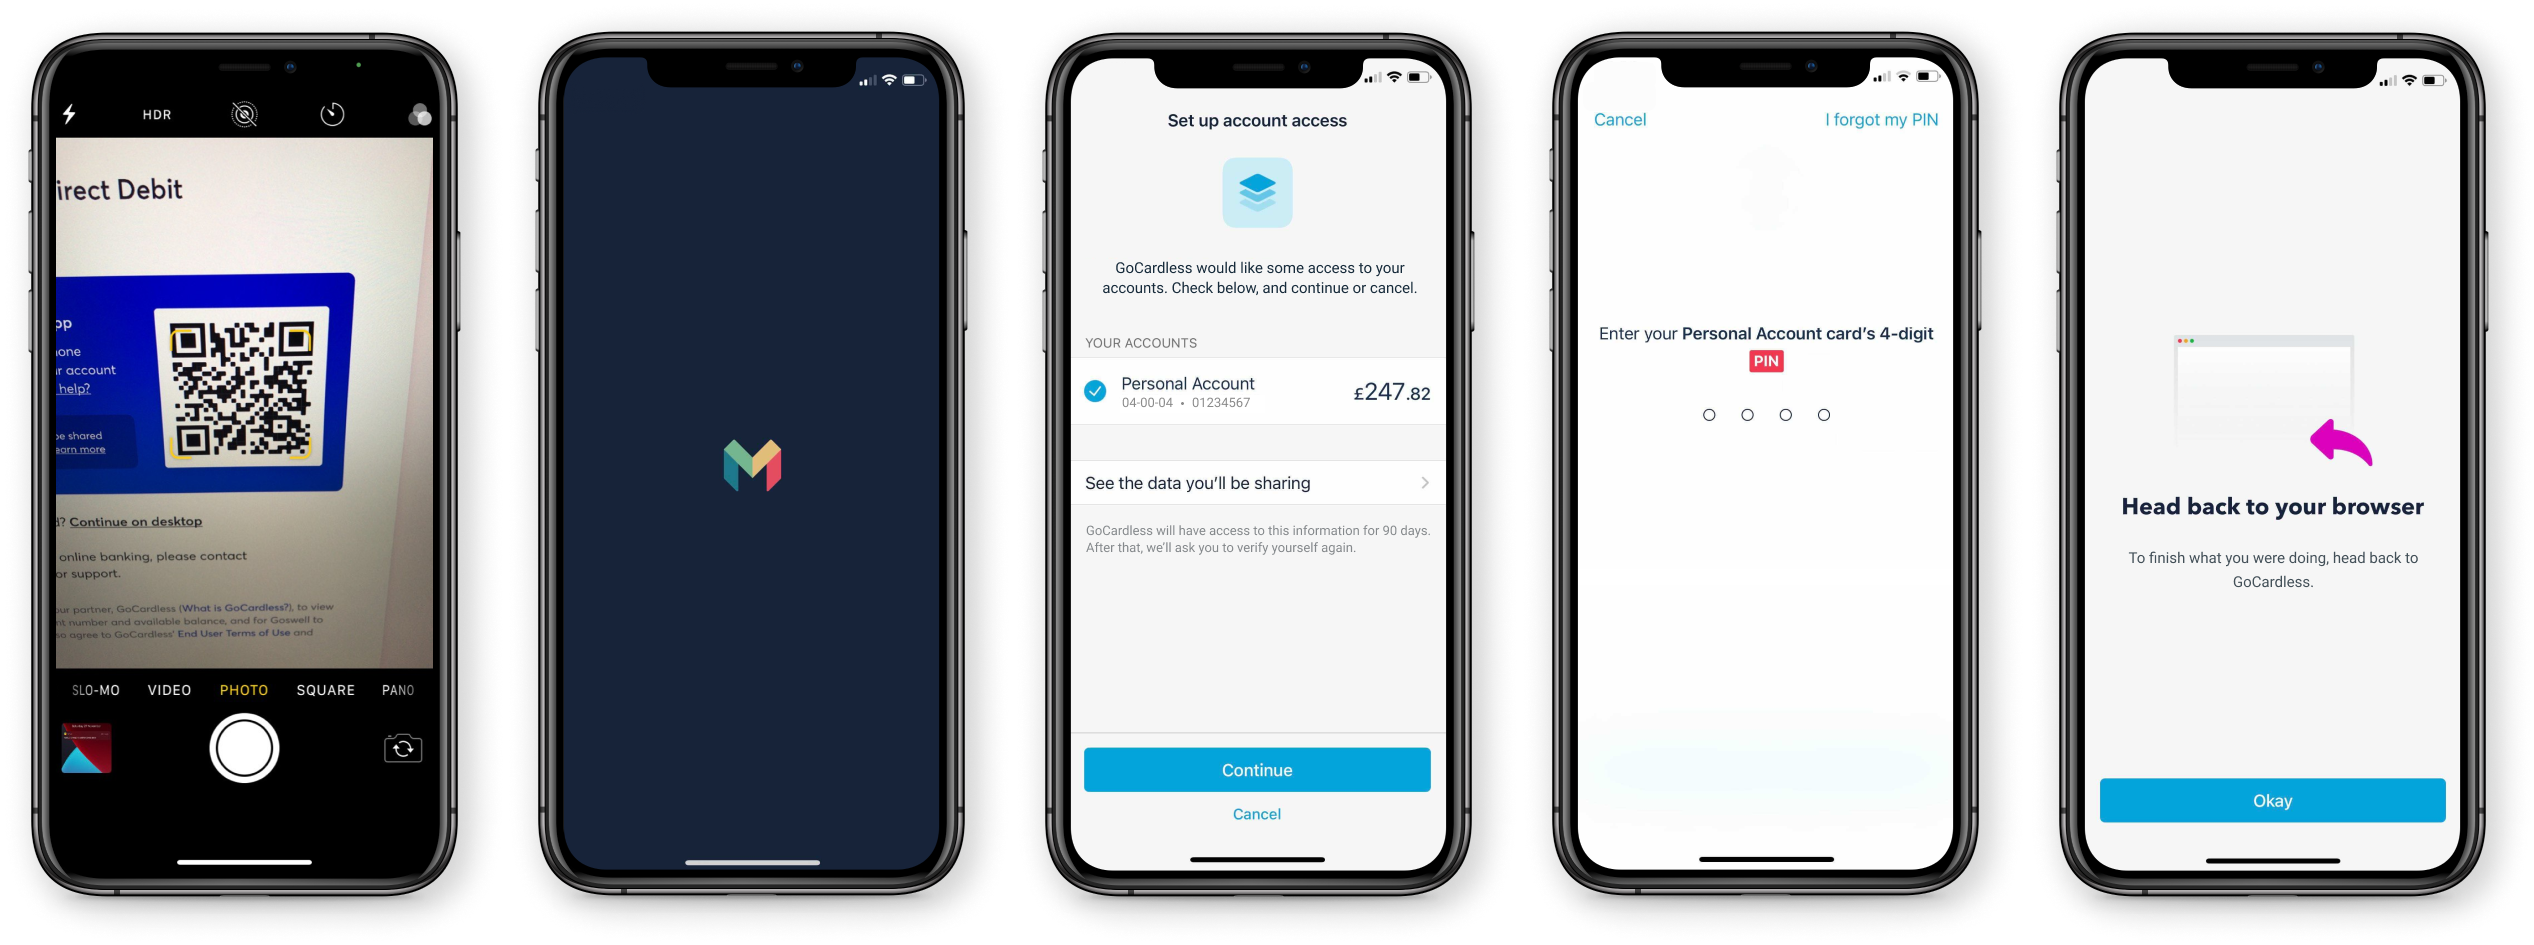
Start verification

Customers can start the verification process by clicking Agree and continue and scanning the QR code.

bacs-02-bank-connect-request

This is an example of a possible verification mechanism, but different schemes and banks have different flows, and we reserve the right to change the mechanism to better suit specific schemes or business needs.

Complete verification

The customer should log in to their bank account and authorise GoCardless to read their details. This is an example of the Monzo mobile flow.

bacs-03-bank-authorisation

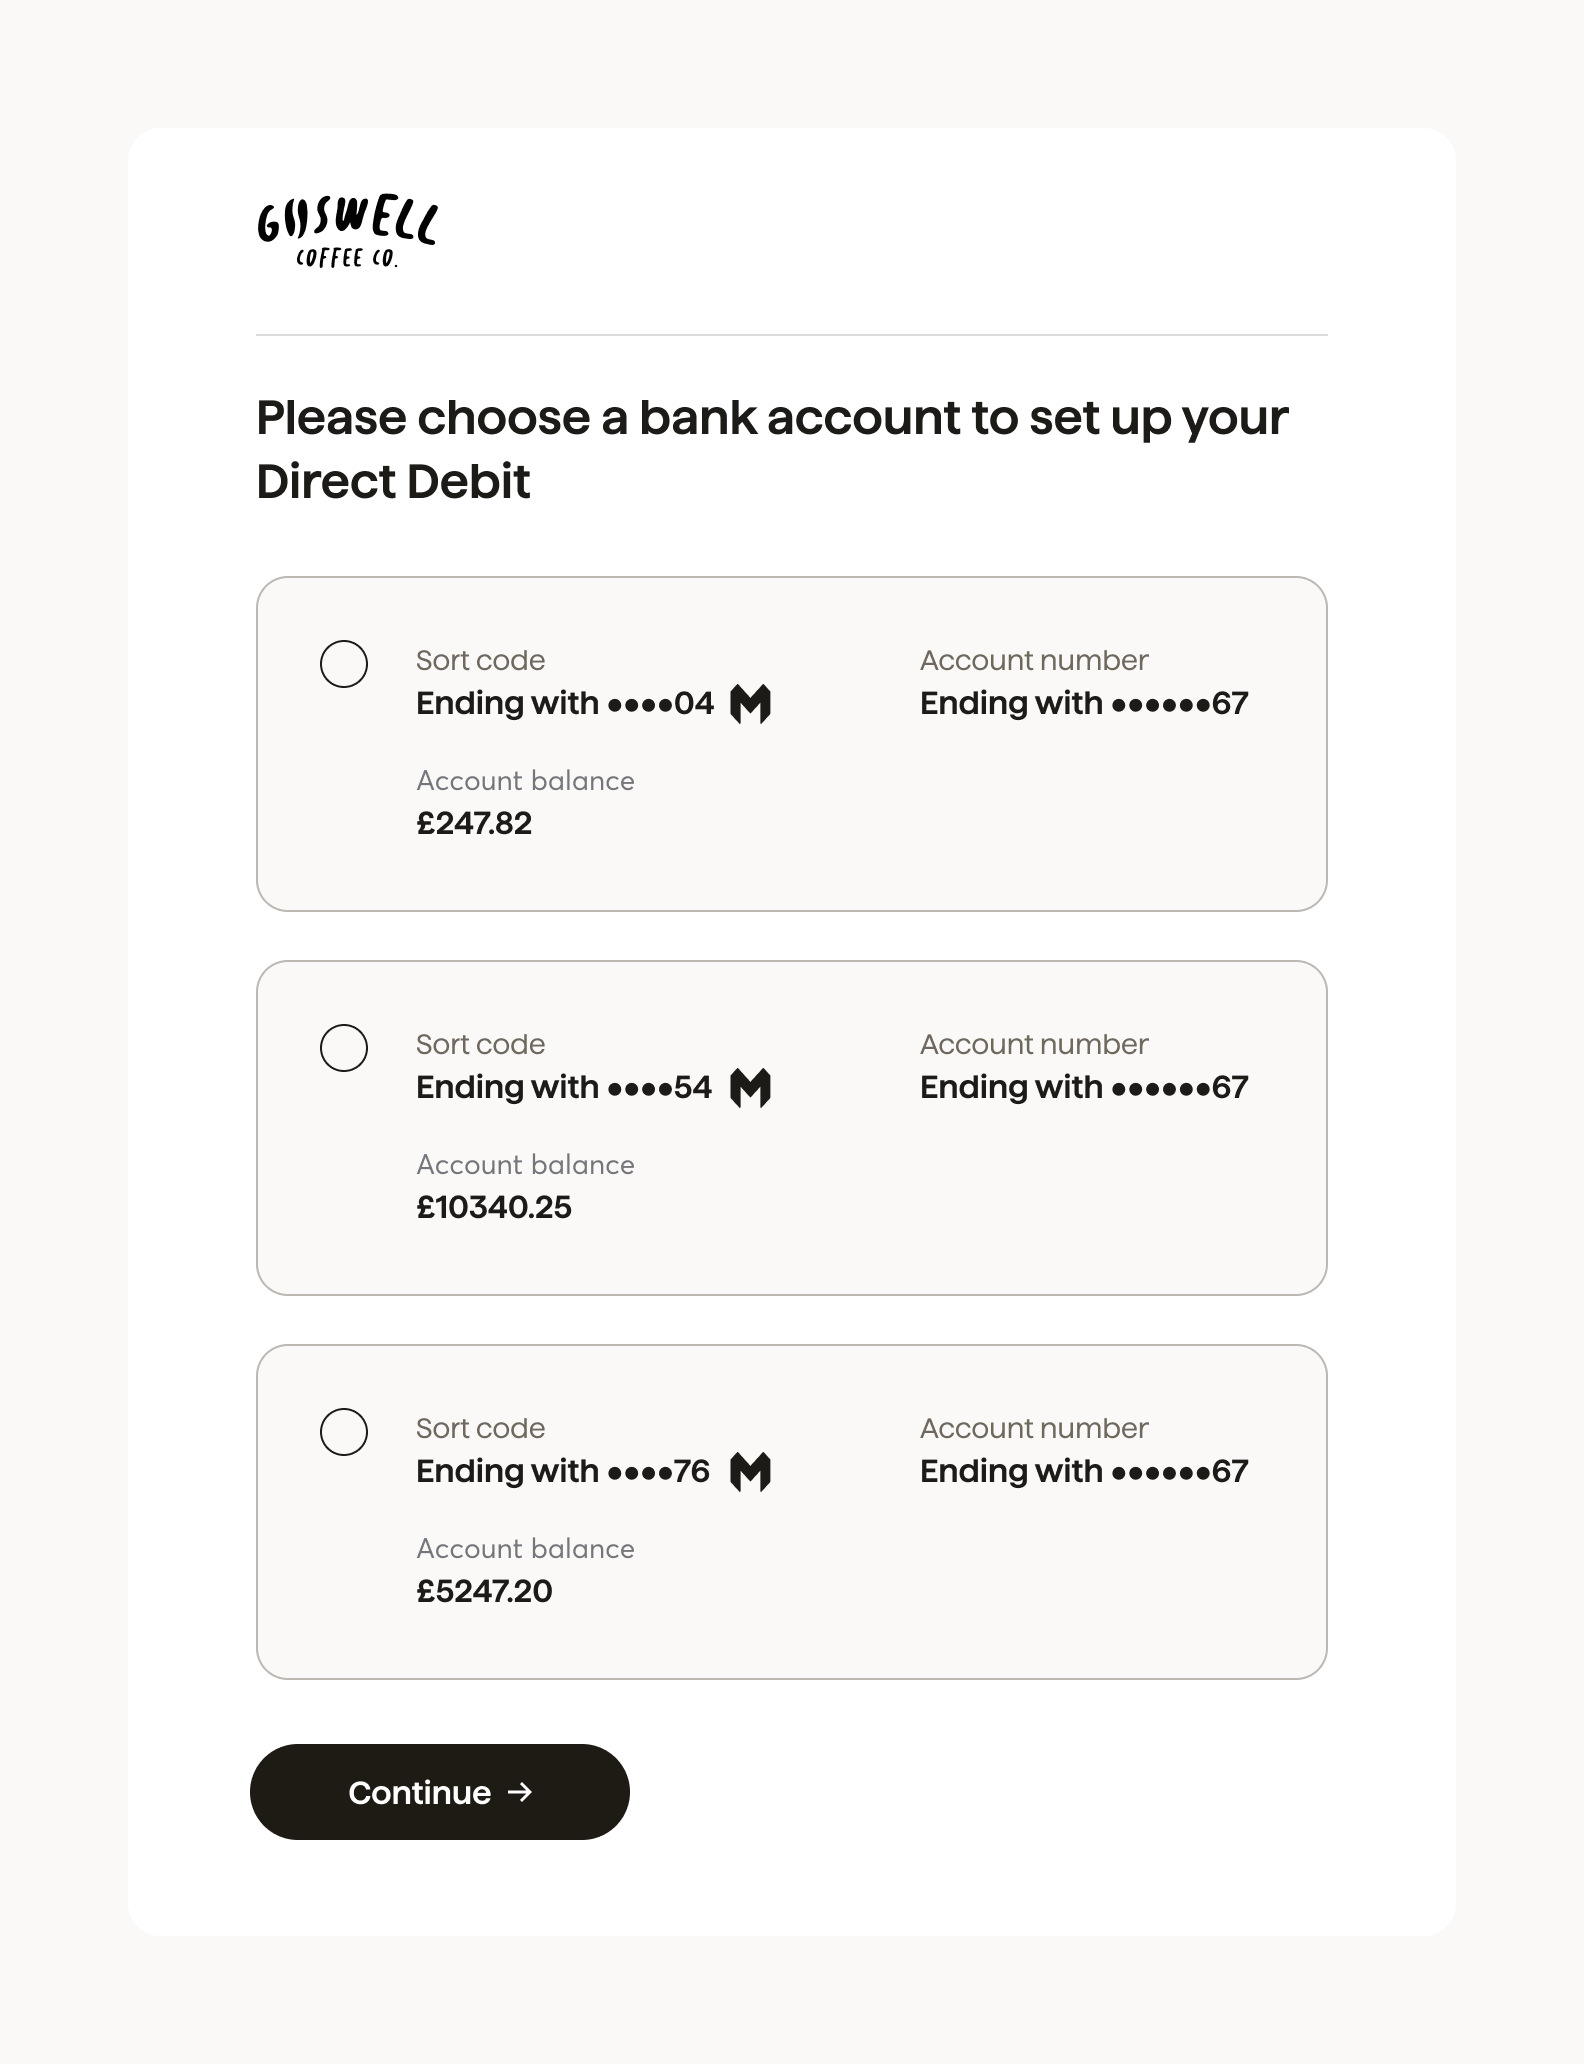
Select bank account

Optional step: This step is required only if the payer provided consent to access multiple accounts eligible for Direct Debit set up.

The customer should select the bank account they would like to set up Direct Debit with.

bacs-03b-select-bank-account

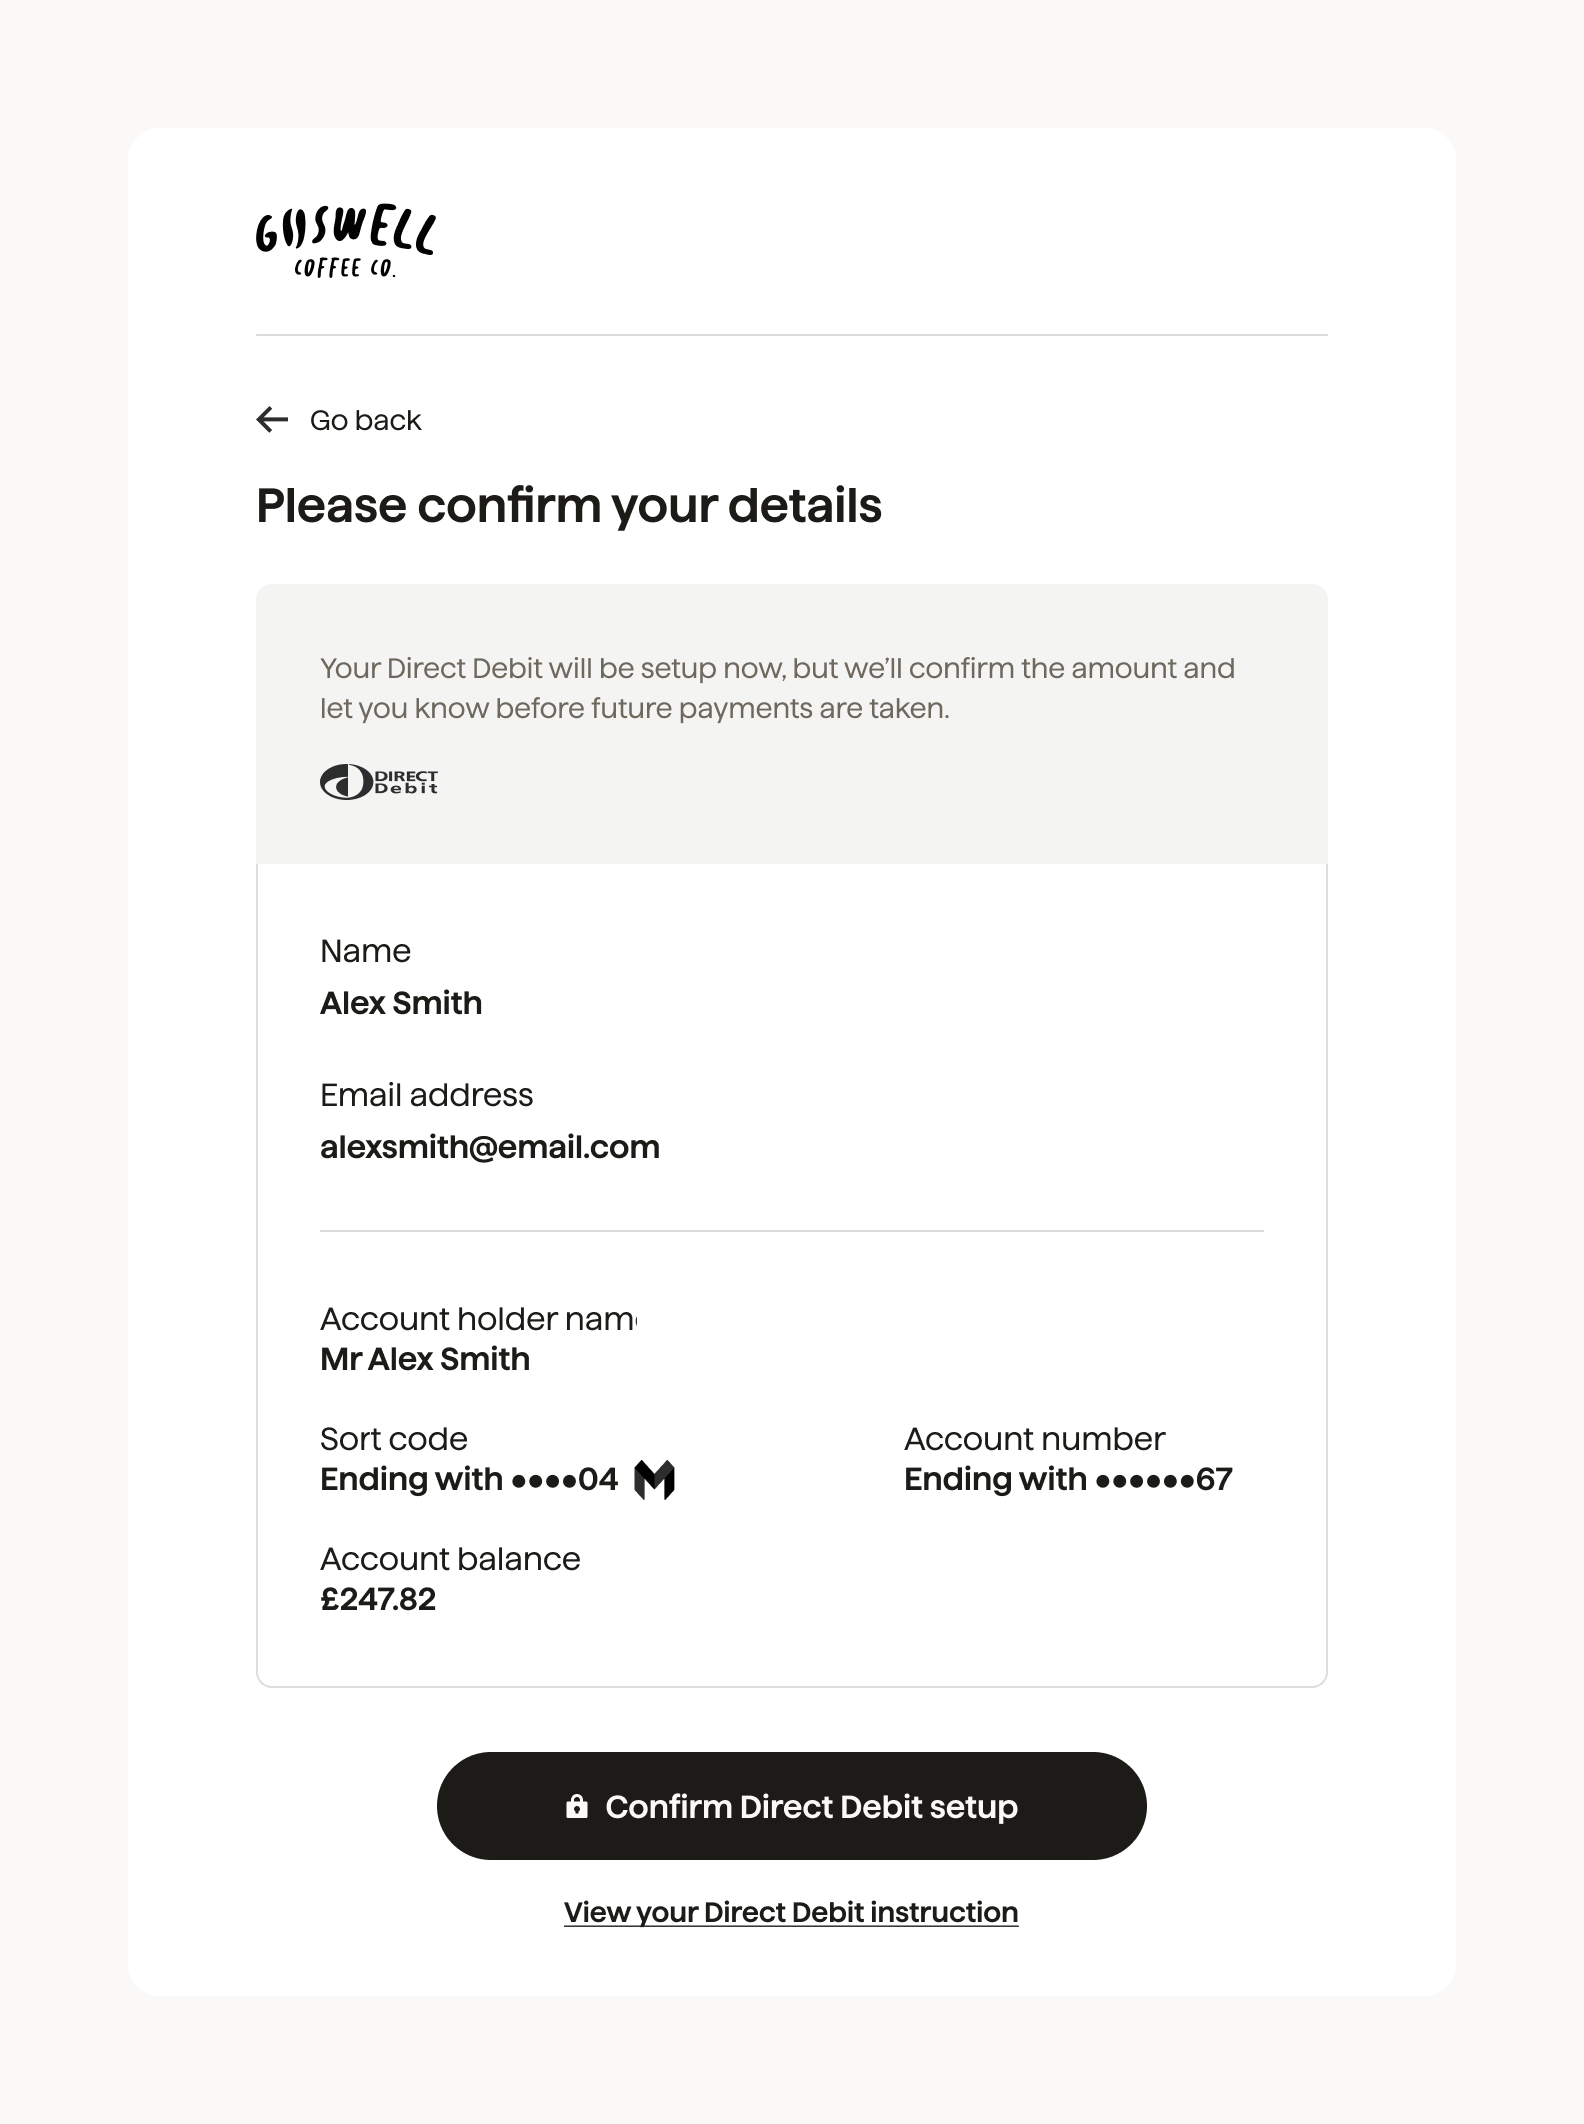
Confirm details

Preview the details and Direct Debit guarantee (changes per scheme) before agreeing to set up the mandate.

bacs-04-confirm-details

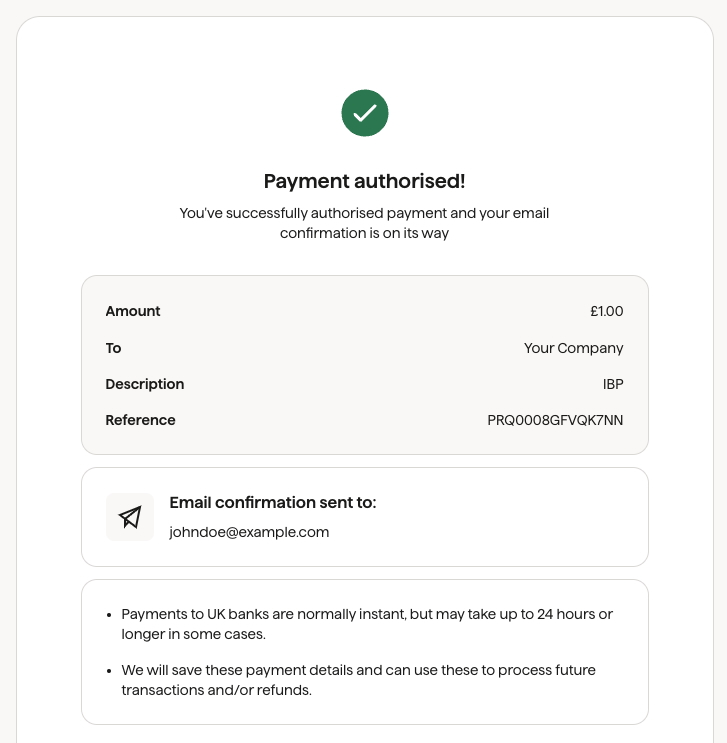
Success

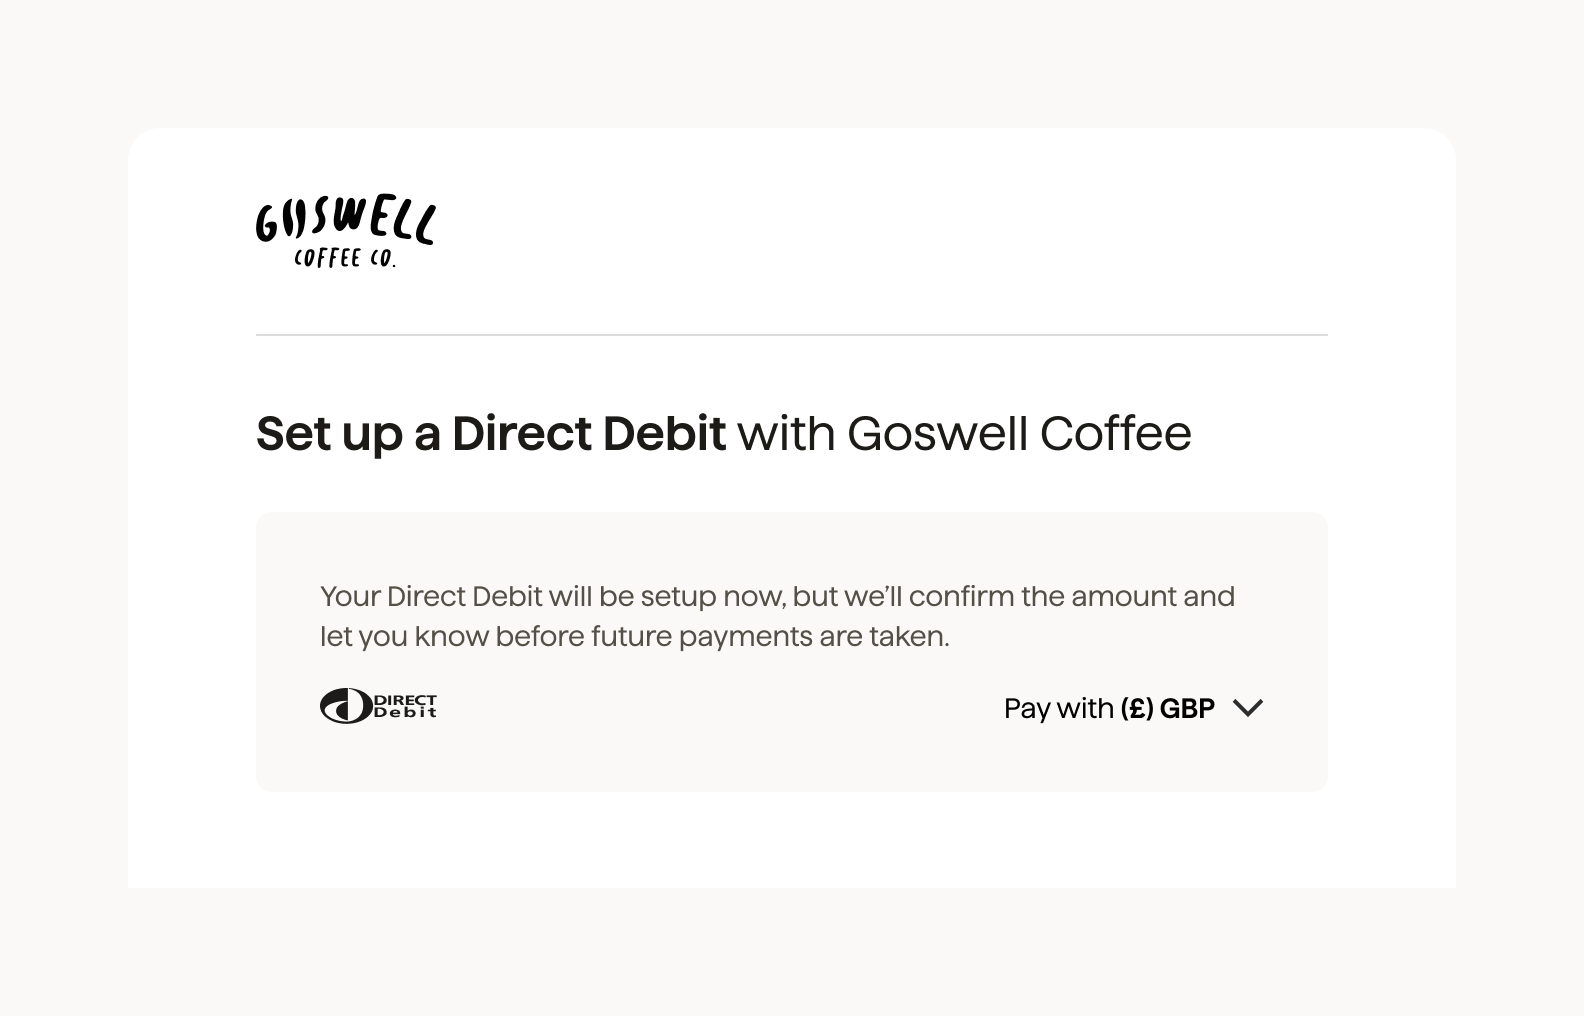
Everything has been set up, and we show a success screen before redirecting back to the Billing Request Flow redirect_uri.

bacs-05-success

Done!#

The Direct Debit mandate has now been created, and the Billing Request is fulfilled. Note that the mandate will have a verified_at timestamp set to the last successful verification, which can be used to identify which mandates have been verified.

You can use the Create Payments endpoint to create new payments against the mandate or use the mandate in other resources such as when Creating a Subscription.

Examples in other schemes#

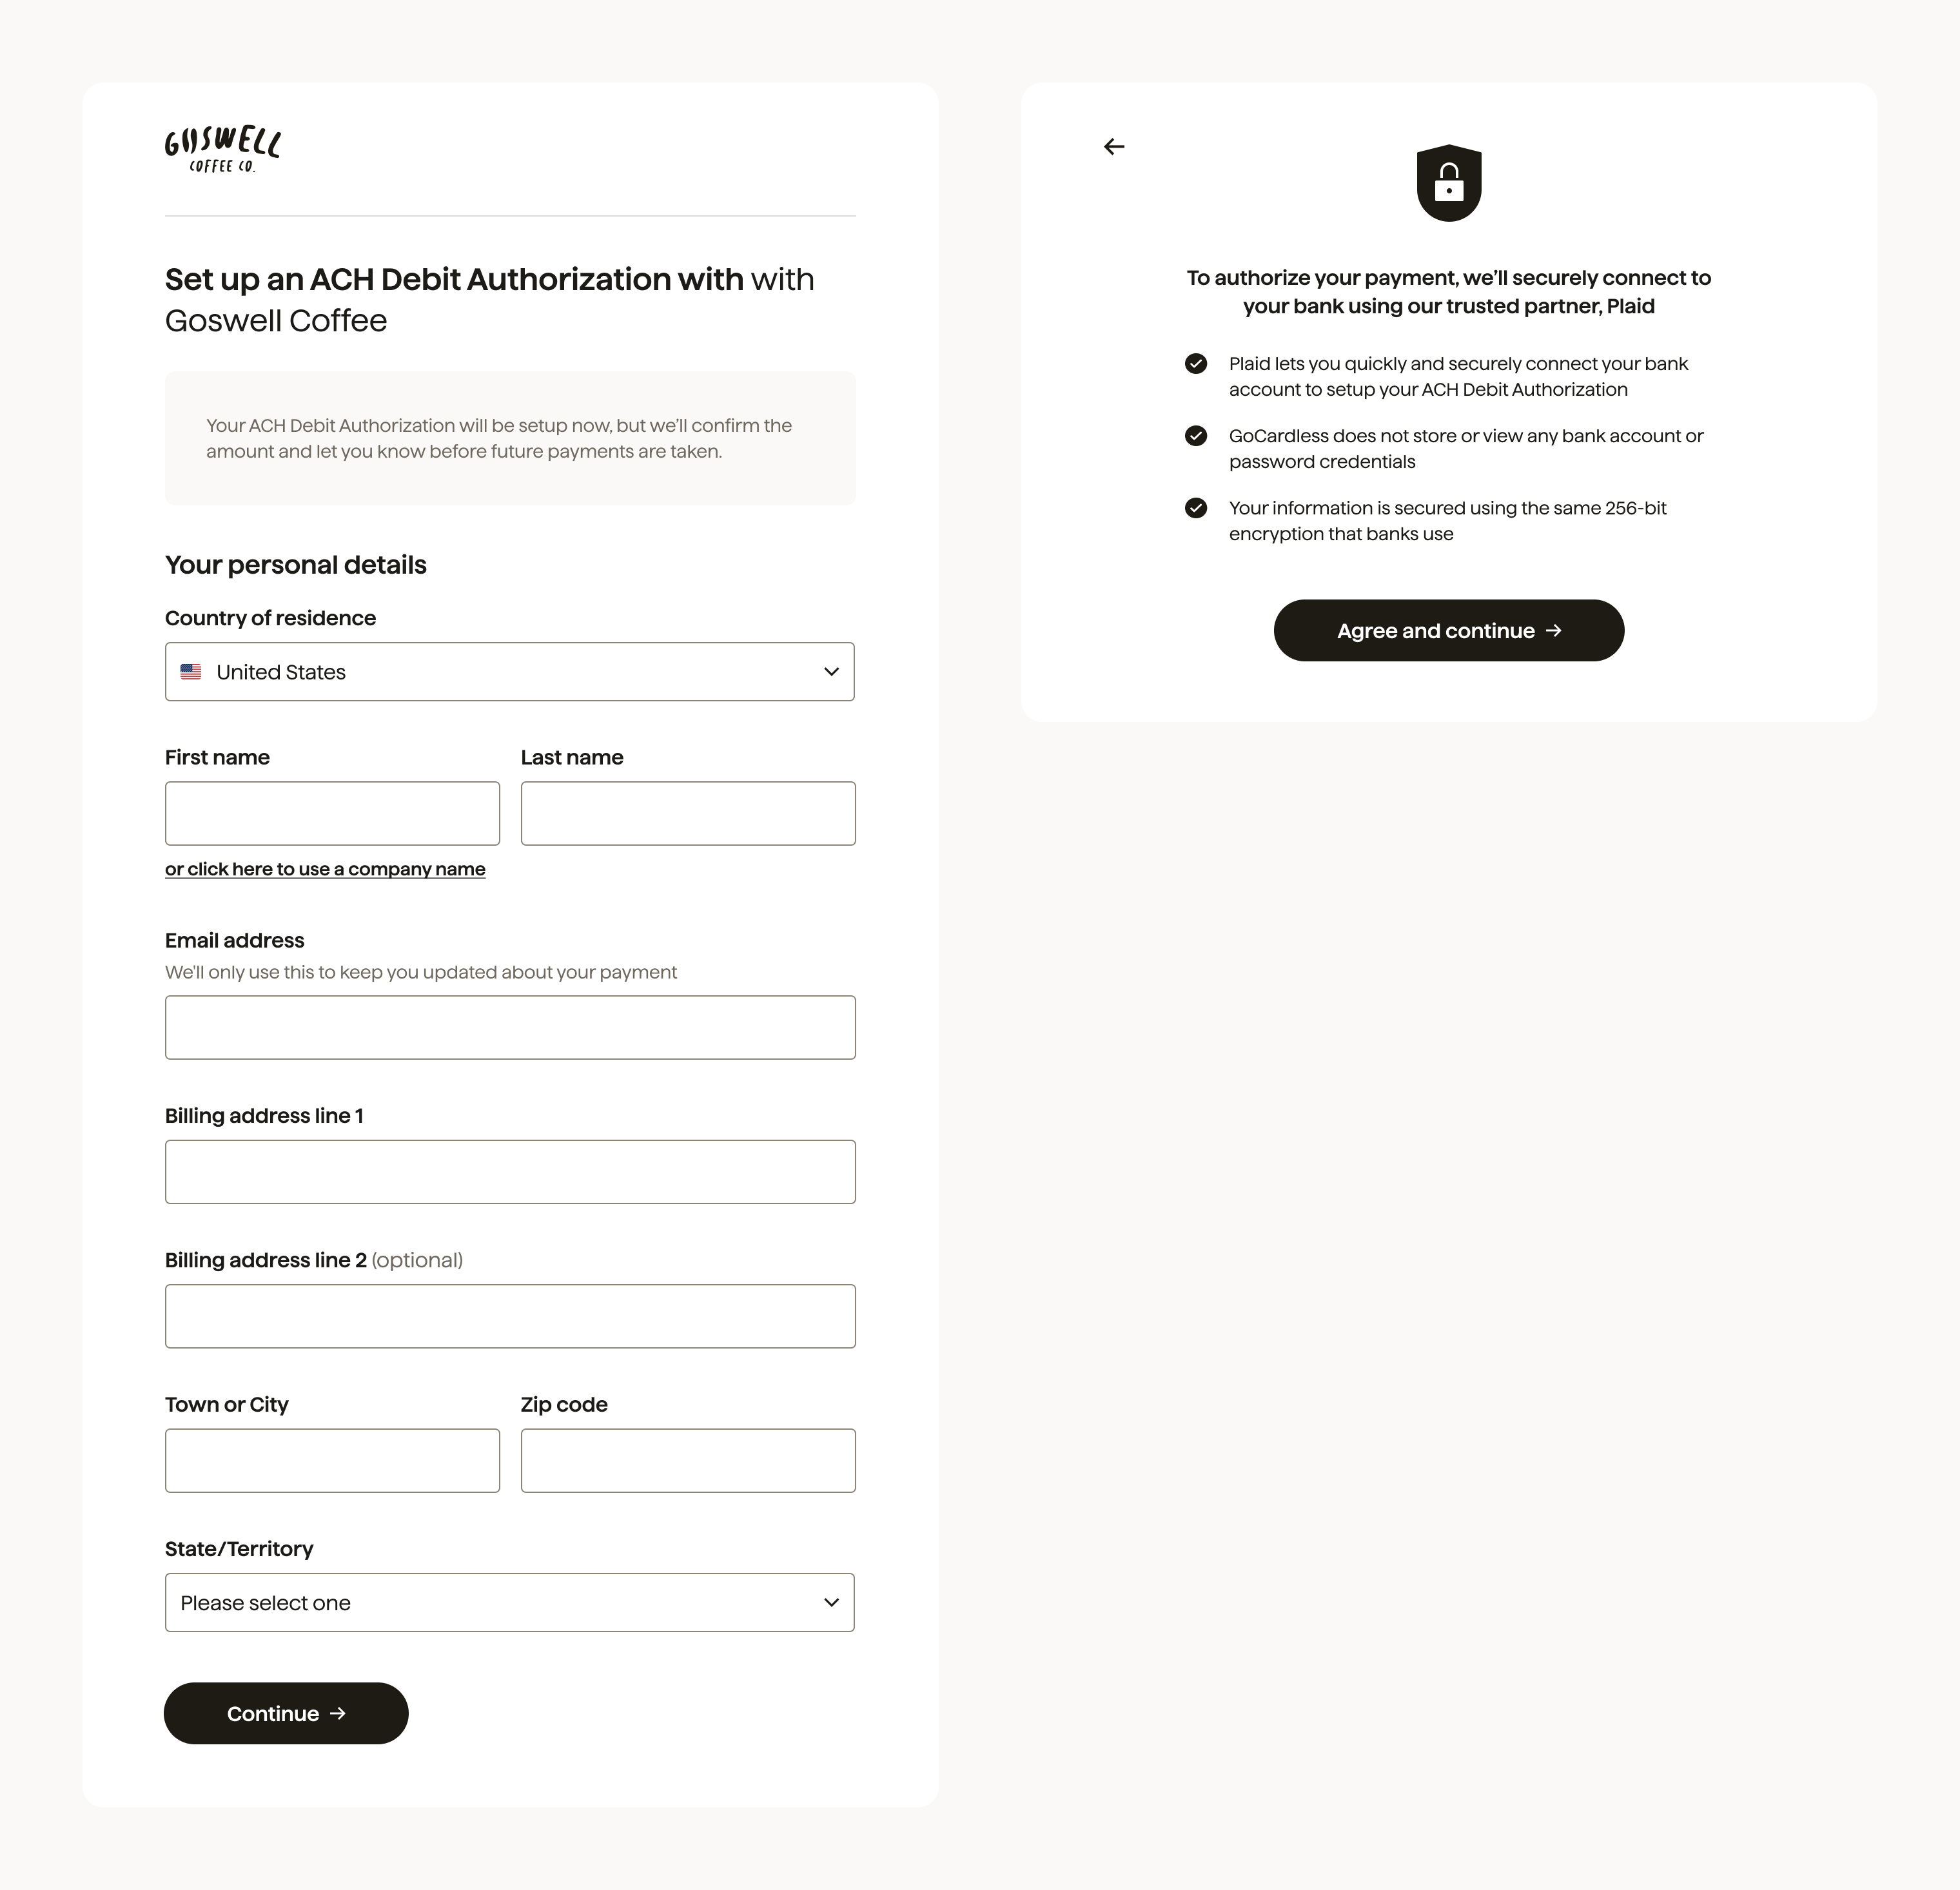
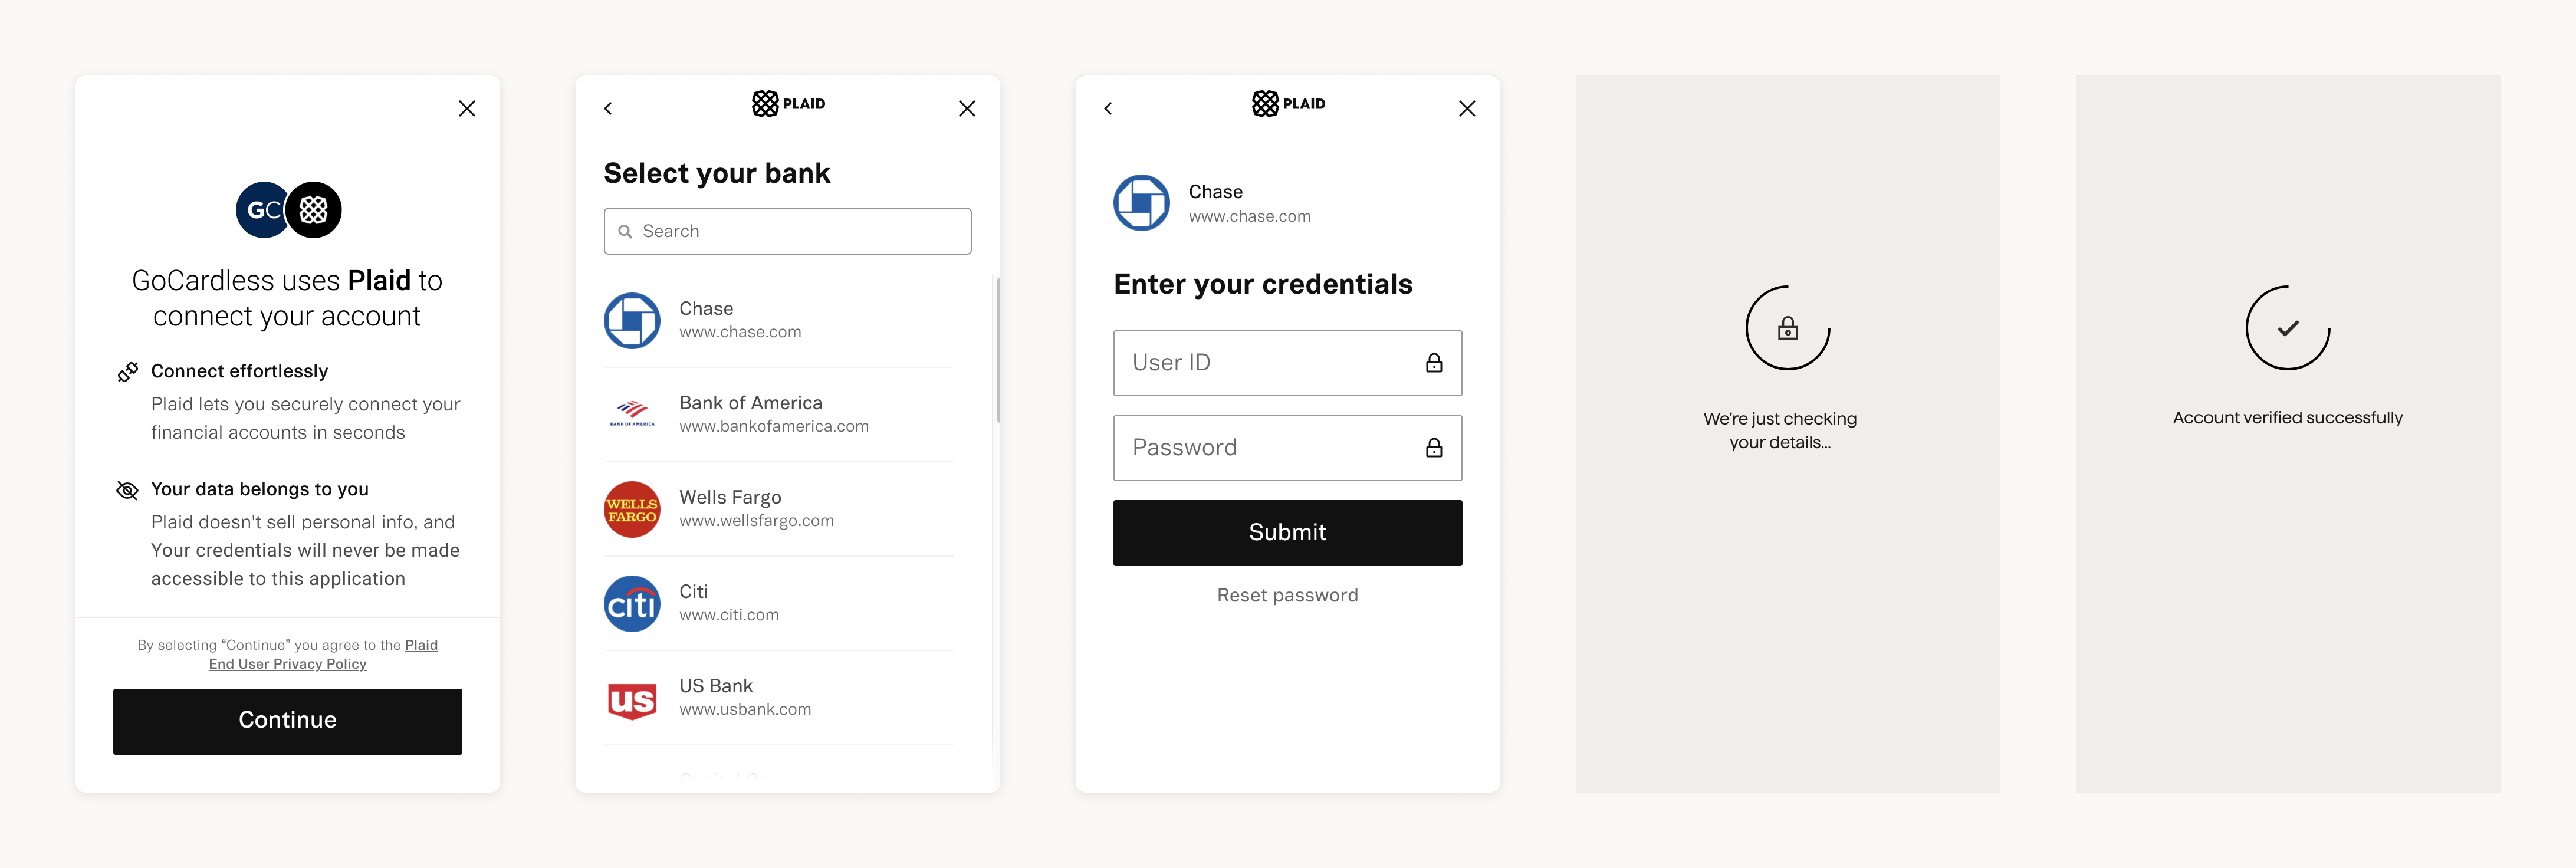
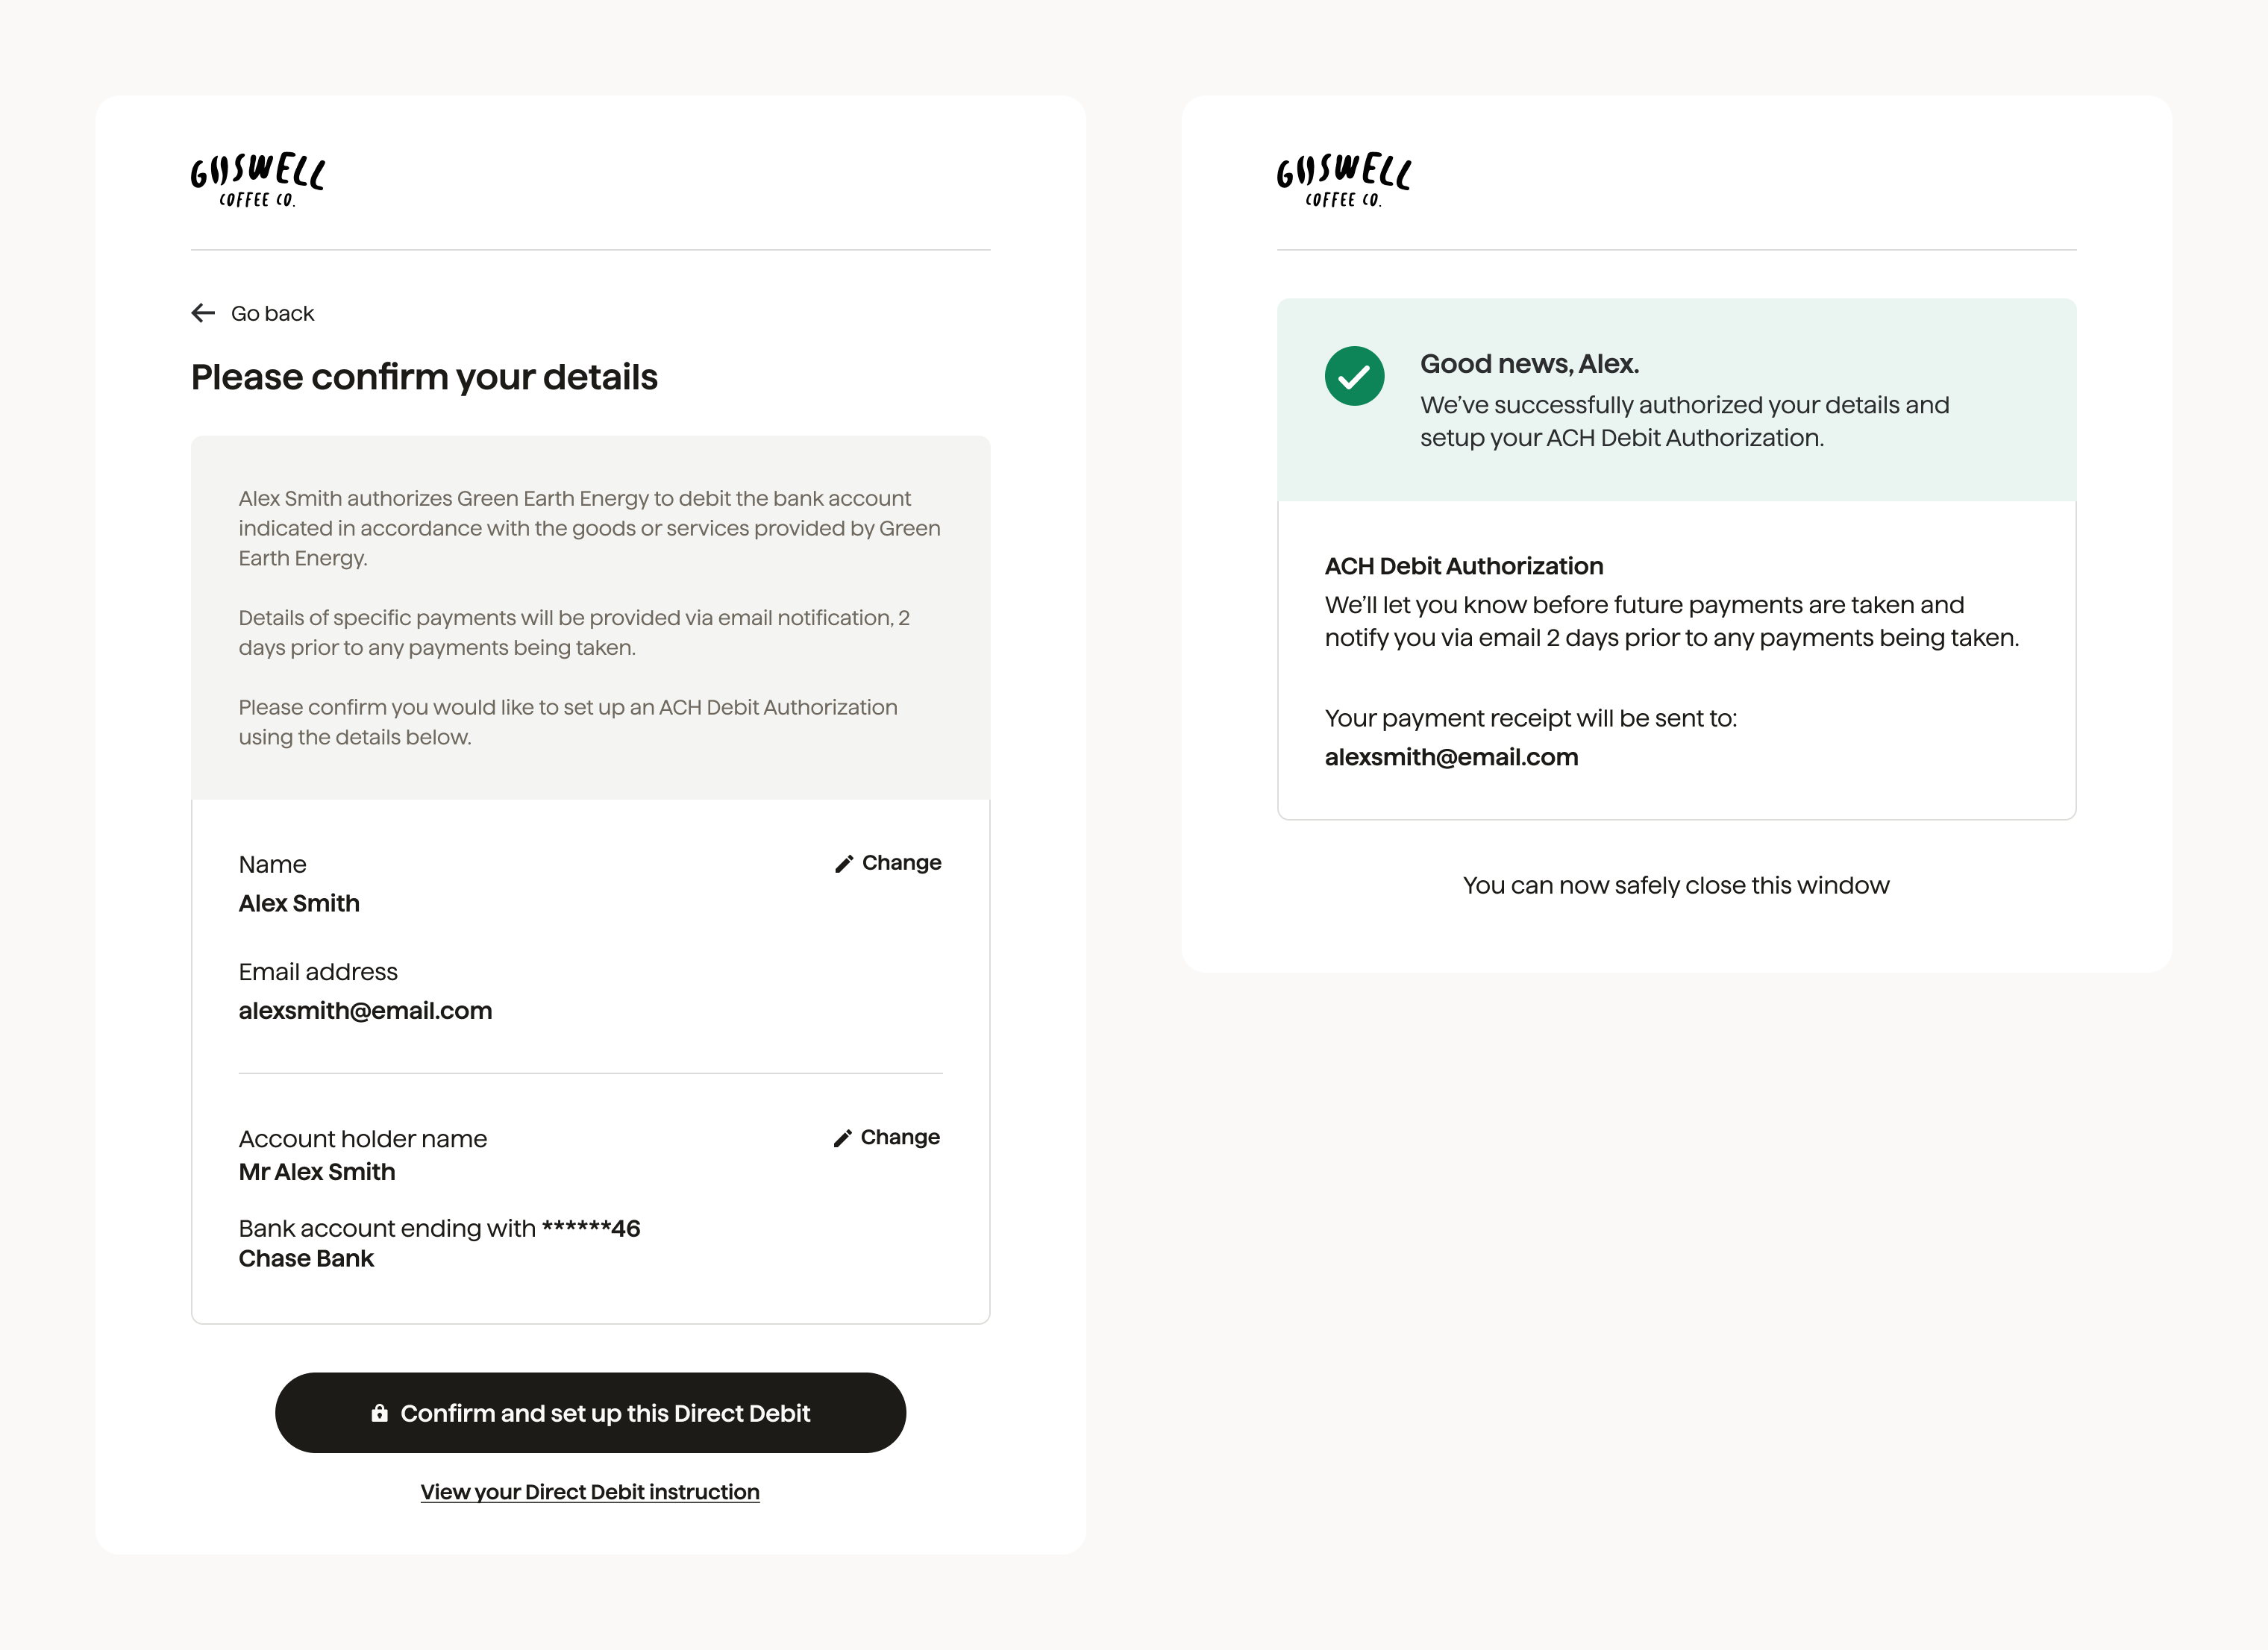
πŸ‡ΊπŸ‡Έ ACH

For the ACH scheme, the verification is processed by the external provider.

ach-flow-example-1

ach-flow-example-2

ACH VM Confirmation page

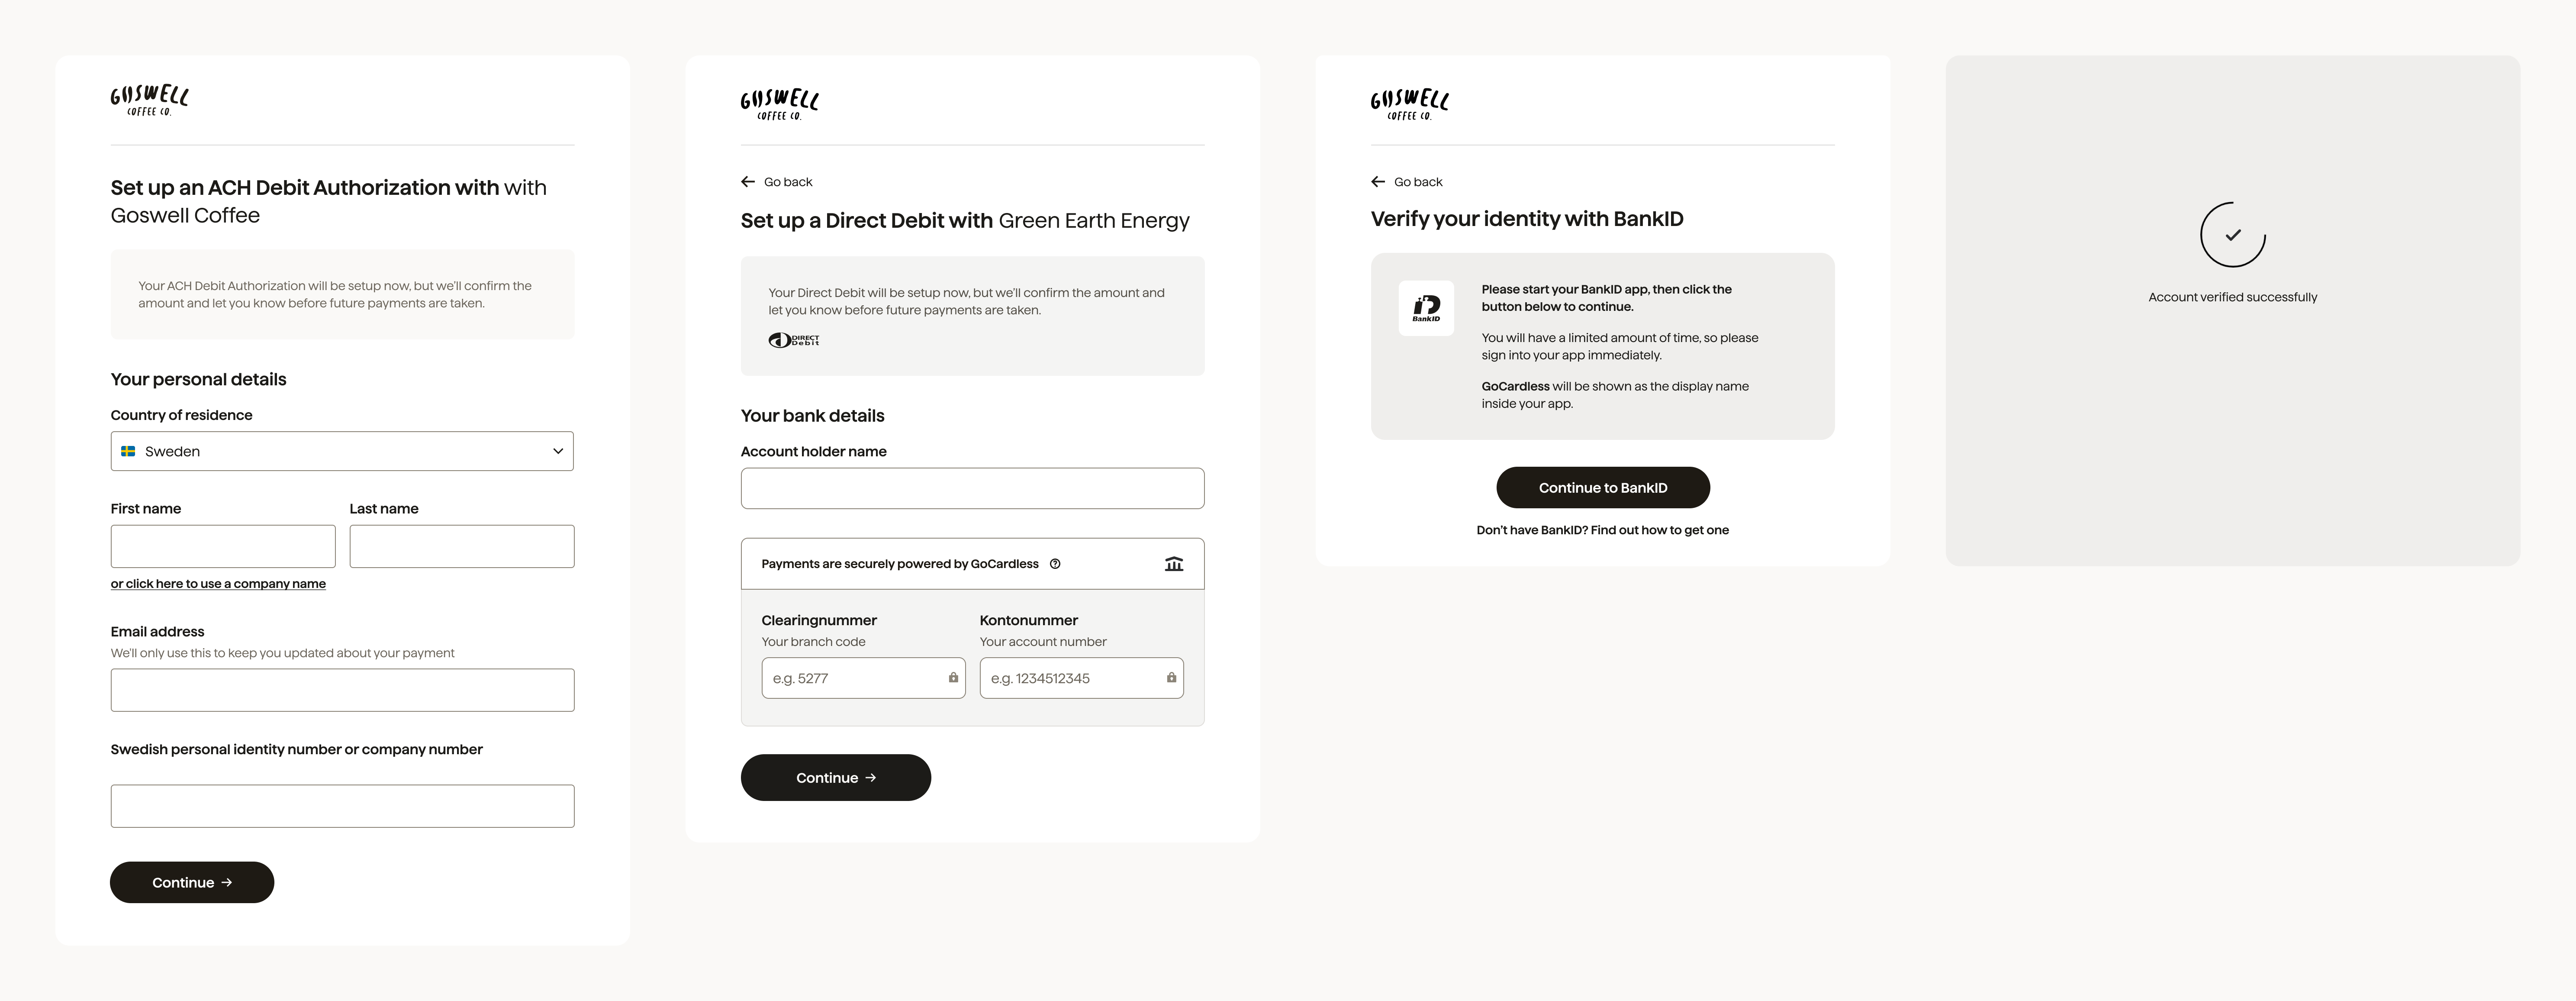
πŸ‡ΈπŸ‡ͺ Autogiro

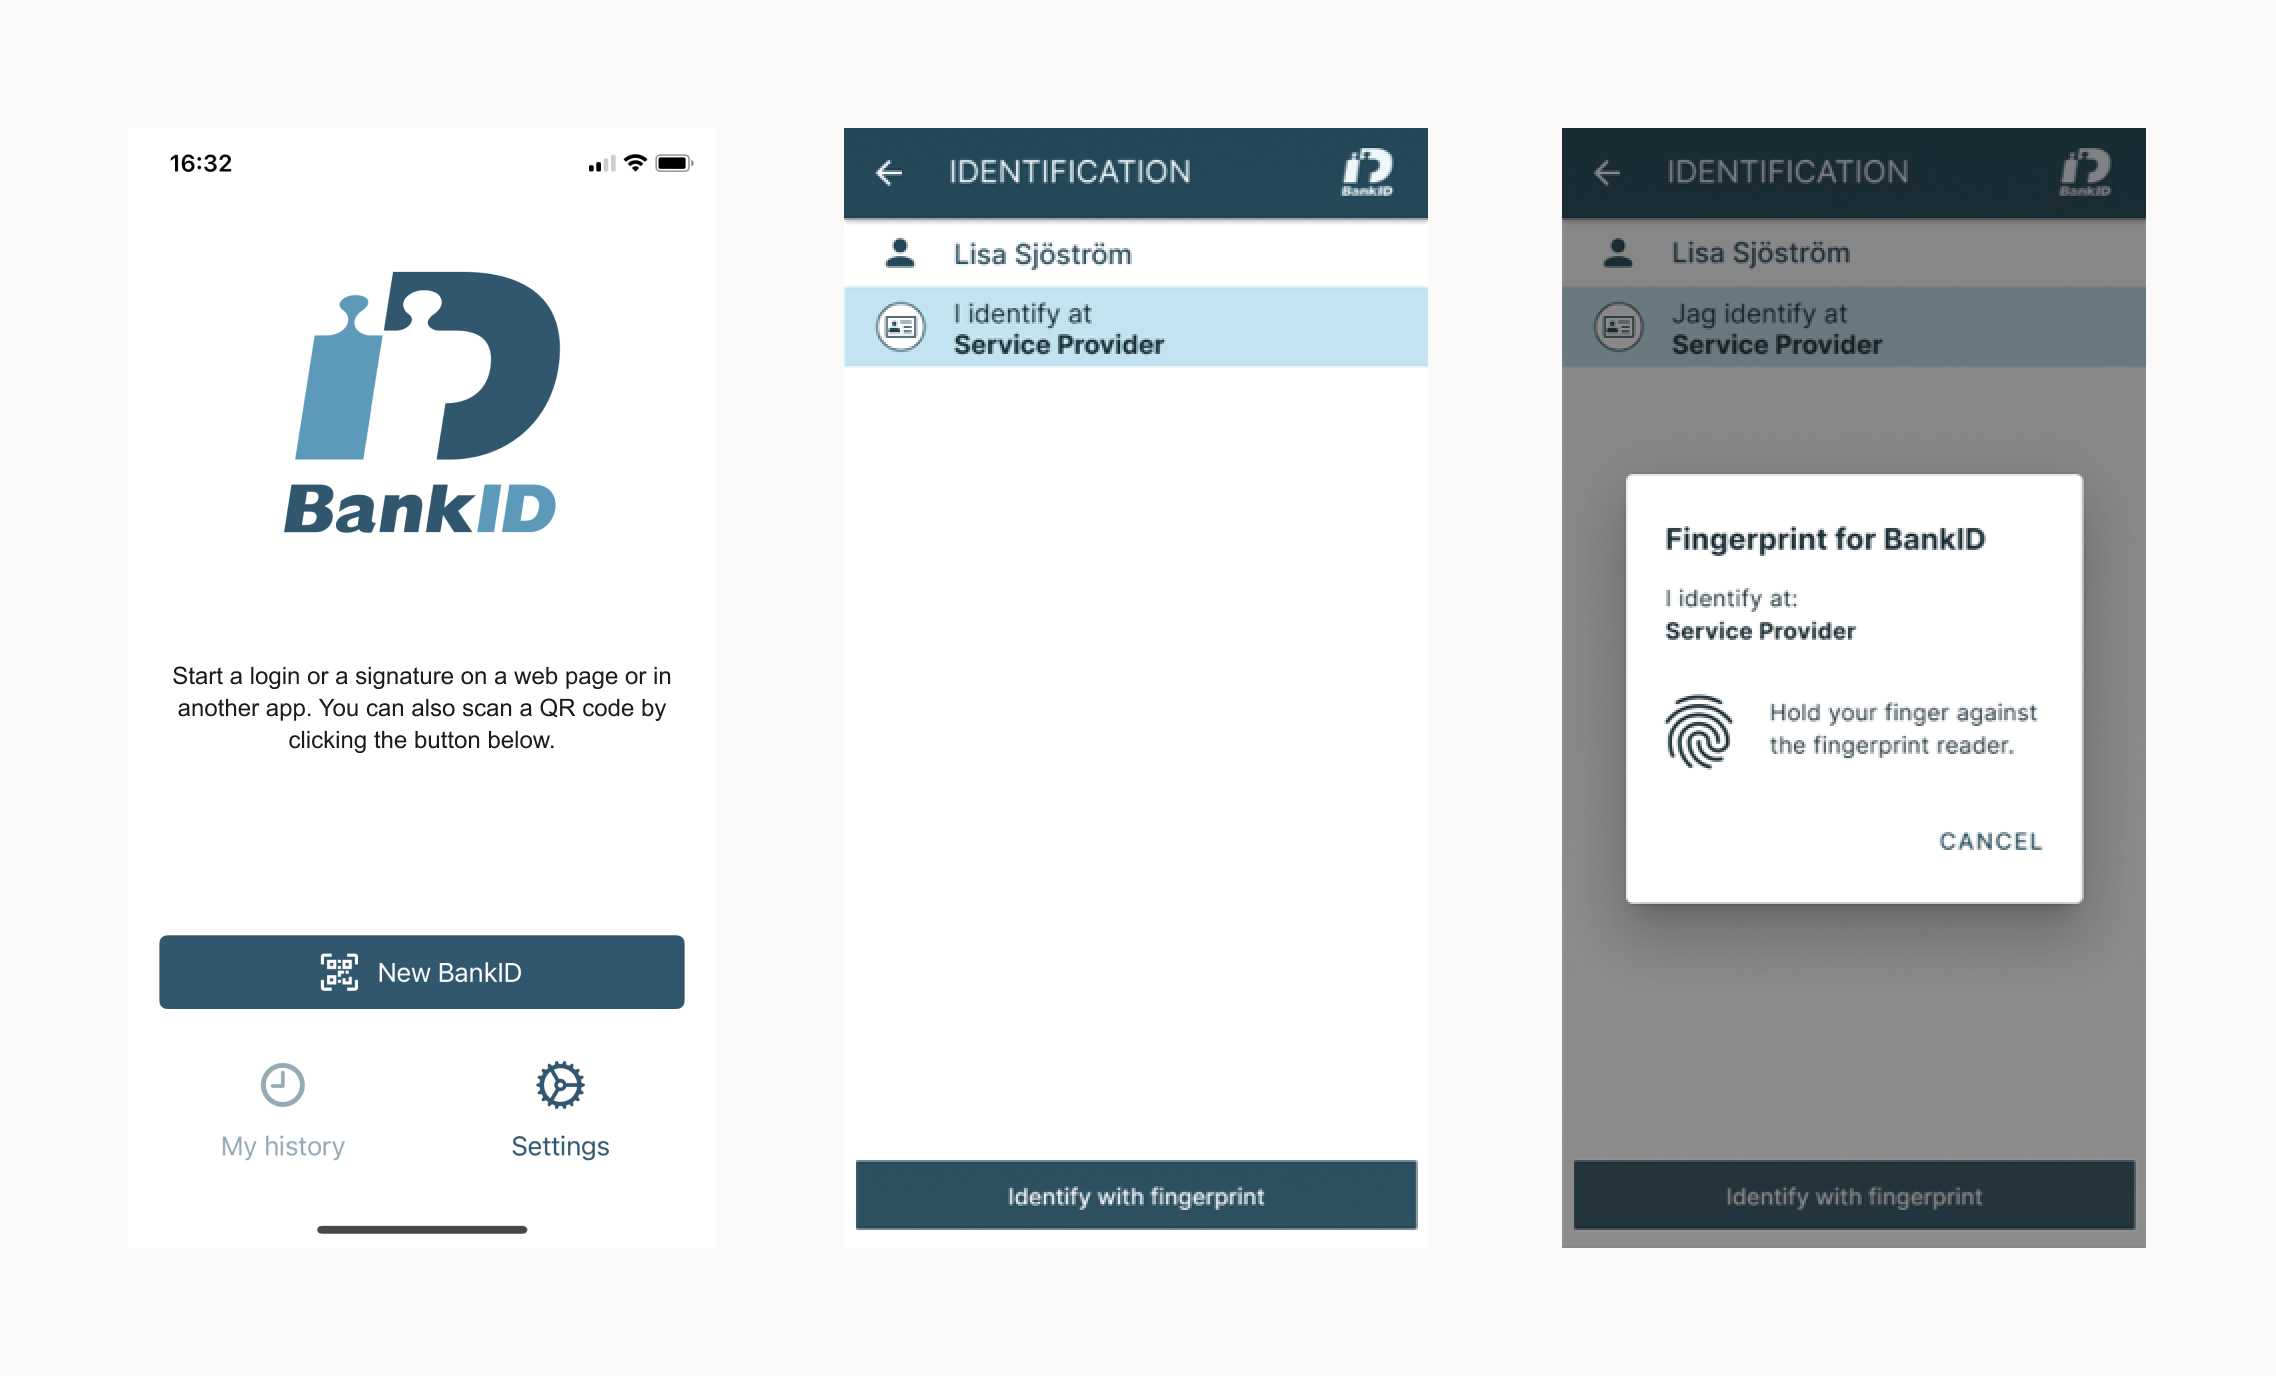
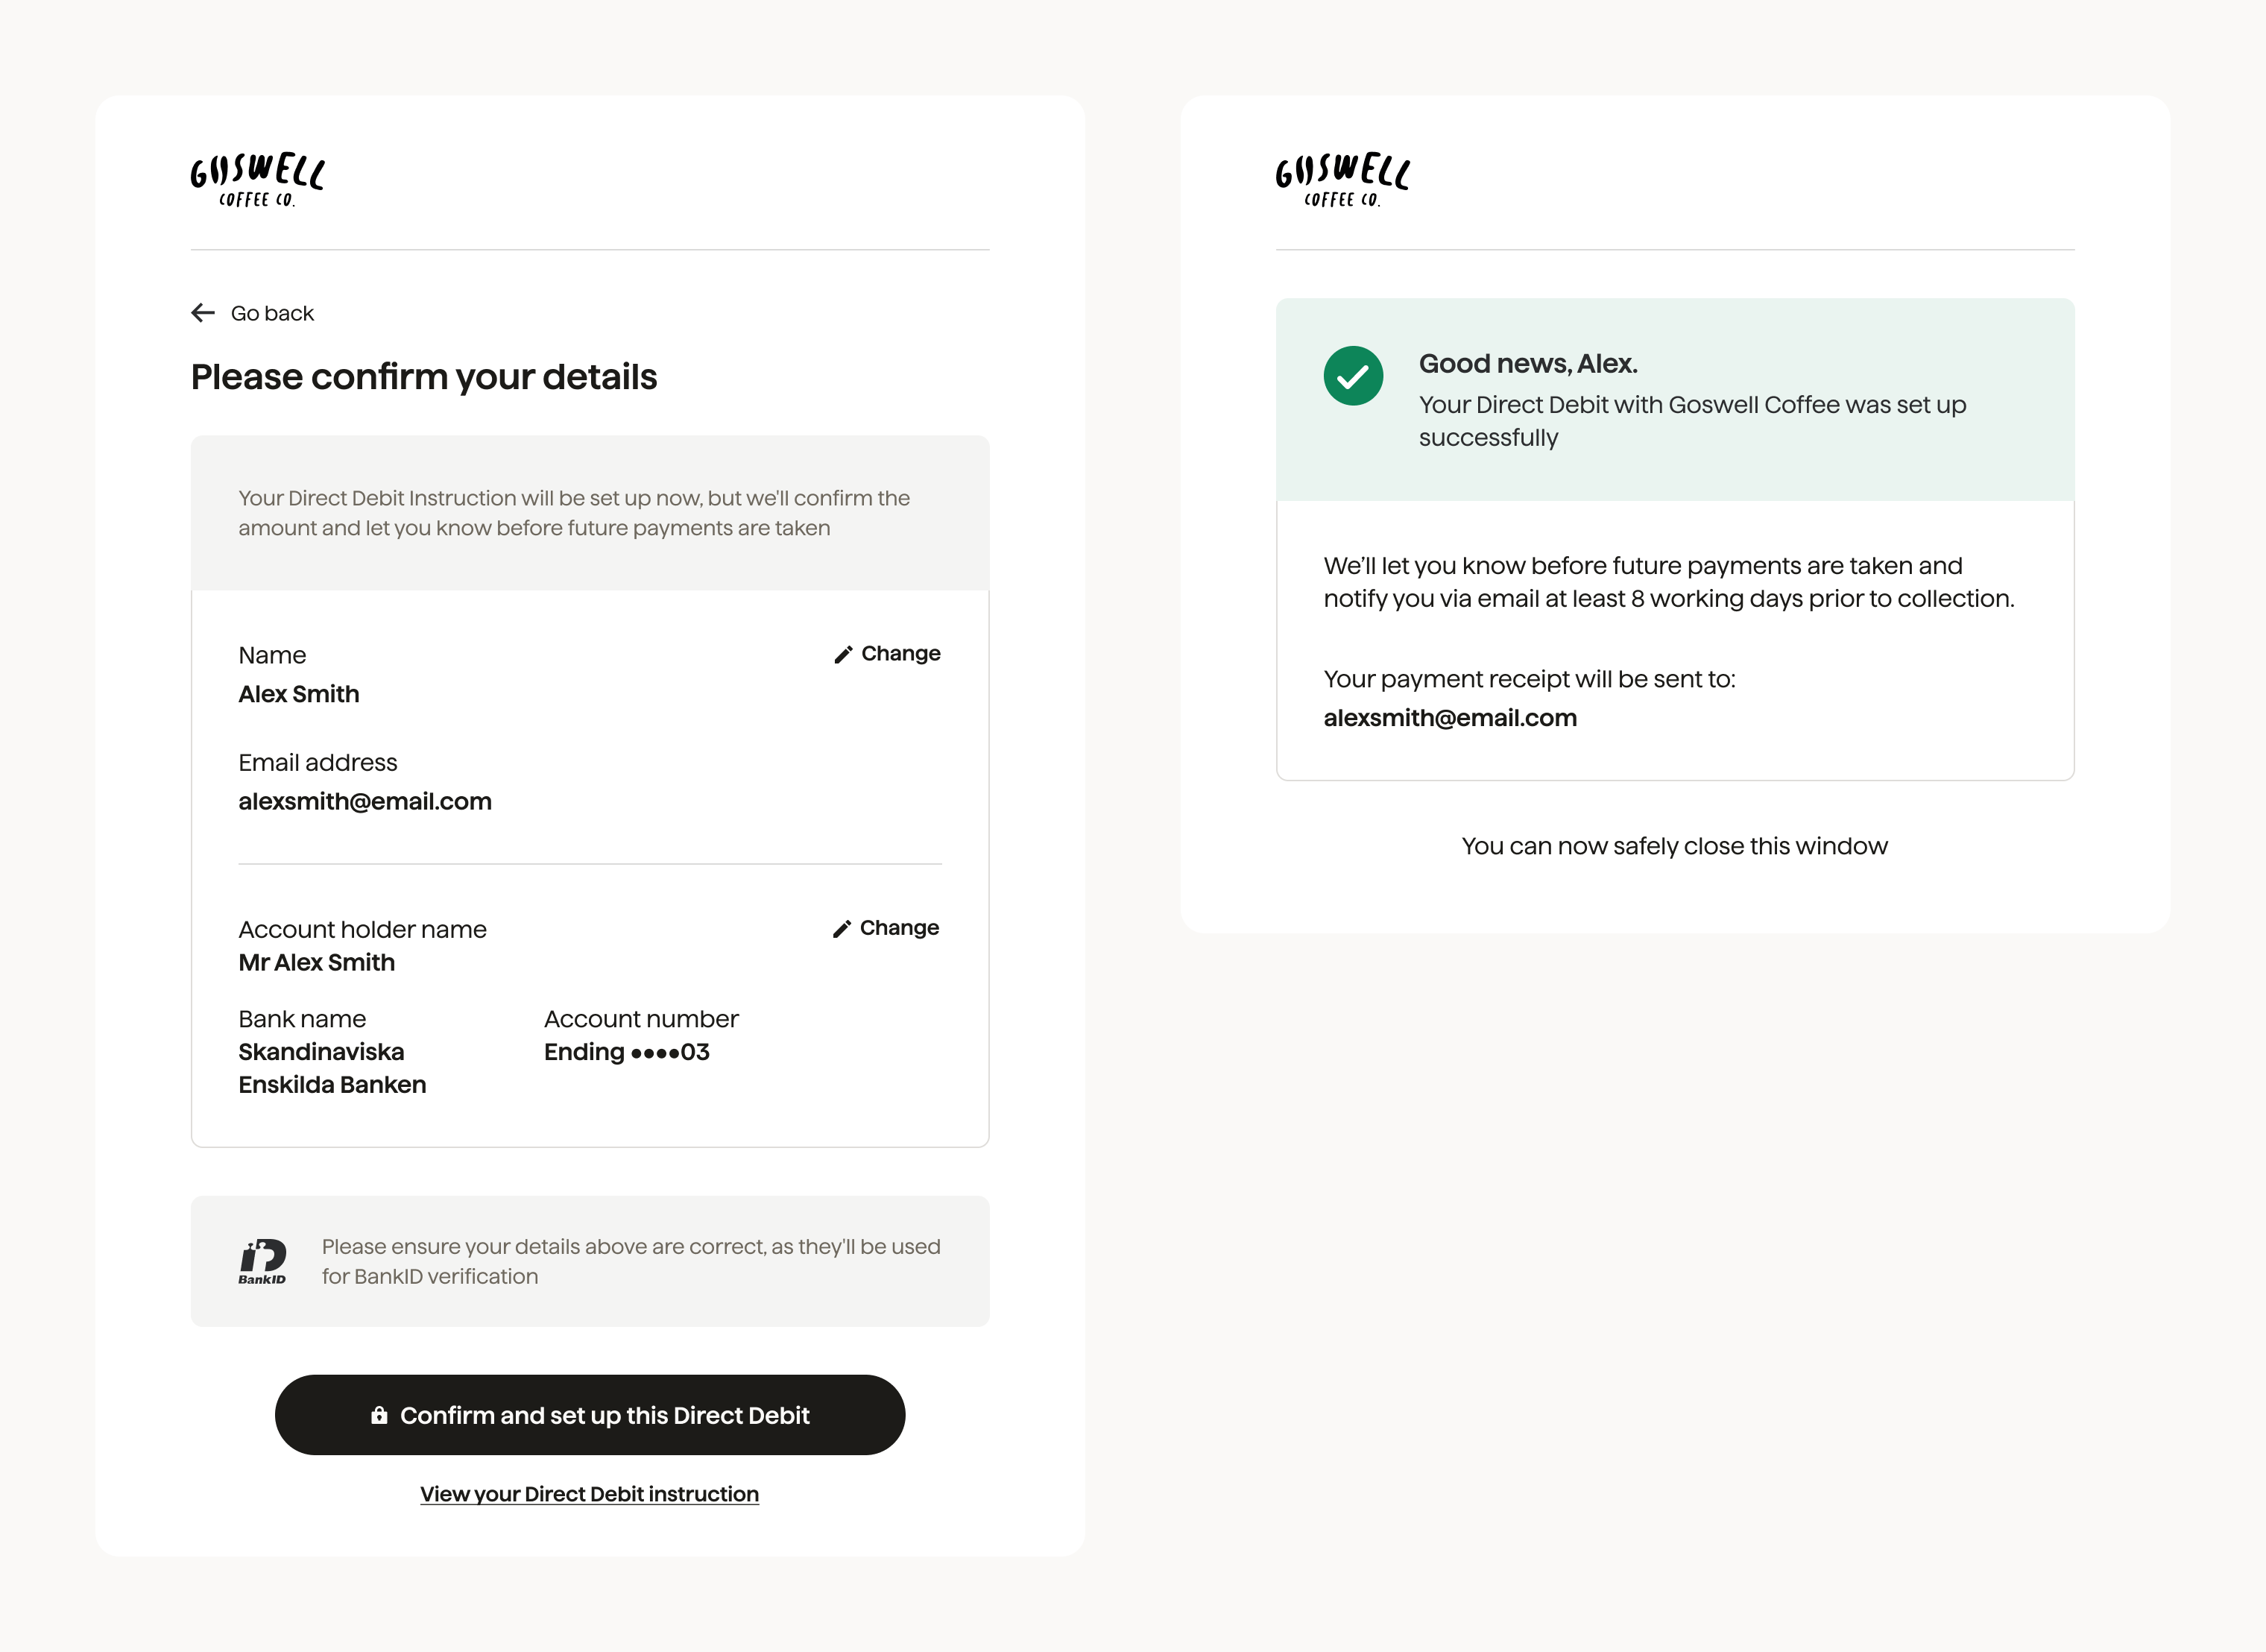
For the Autogiro scheme, it is a requirement to put all the payers setting up the Direct Debit Mandate through BankId verification. This means you will need the Verified Mandates upgrade enabled in order to have mandates set up in the Autogiro scheme.

bankid-flow-example-1

bankid-flow-example-2

bankid-flow-example-3

Frequently asked questions#

How can I test this flow if I have the upgrade for using Protect+?

Set the verify option on the billing_request to always to test the flow.

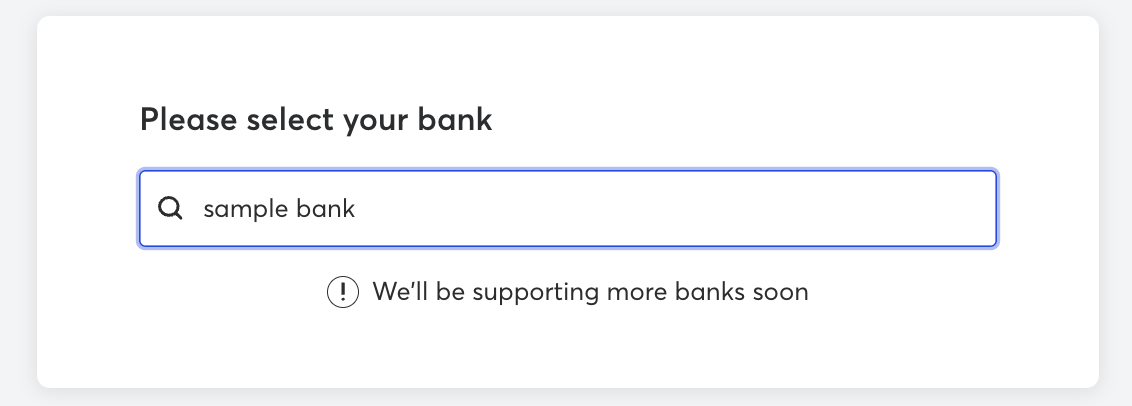
What does "We'll be supporting more banks soon" mean?

This means that the institution the payer is trying to use is not supported by our Account Information Service (AIS) provider.

bacs-verified-mandates-bank-not-supported

How do I know if the verification was successful?

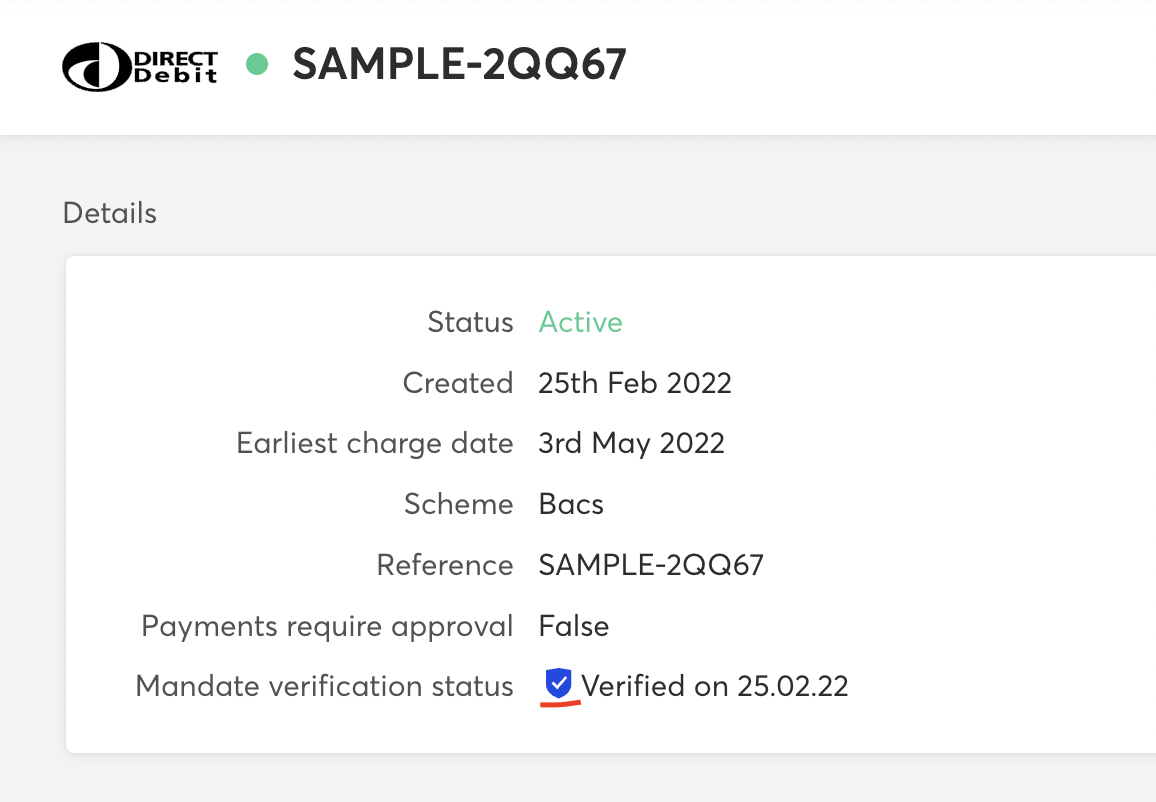
A timestamp for authorised_at will be set on the bank_authorisation resource for the billing request. The created mandate will also include a 'verified' badge next to the Mandate verification status on the merchant dashboard.

bacs-verified-mandate-badge

What's next?#