
GoCardless Components#
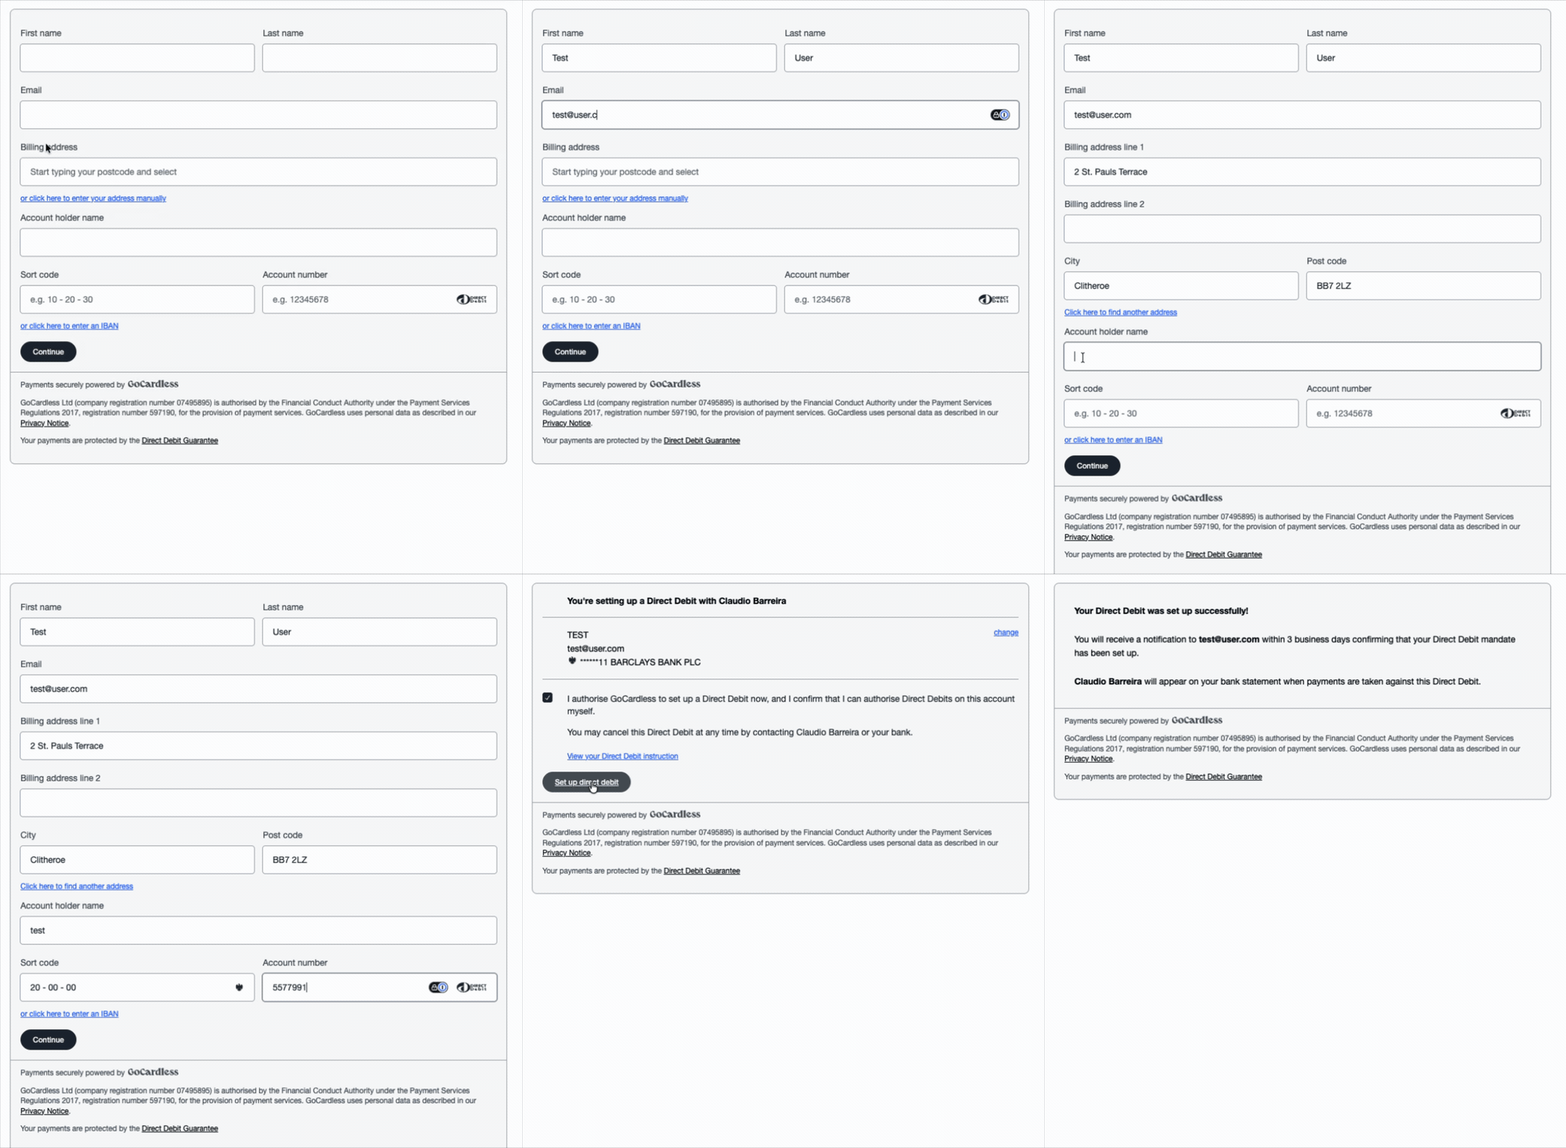
GoCardless Components is a JavaScript library for setting up a Direct Debit mandate form directly inside your checkout. Payers fill it in and authorise the mandate without ever leaving your site or app. GoCardless handles compliance, payer name verification, and form validation behind the scenes, while you keep full control over the surrounding experience.
Under the hood, Components creates and guides the payer through a Billing Request — the GoCardless object that brings together the customer, their authorisation, and their bank details into a single, manageable object (see the Billing Requests overview for more).
Unlike the Drop-in Flow, which renders as a modal, Components embeds inline in your checkout and offers deeper styling control — with less build effort than fully Custom Payment Pages. Today, Components only supports mandate creation for Bacs (UK) and Sepa (EUR).
Best for:
- Customers setting up their Direct Debit without leaving your website or app
- Fine-tuning your checkout's design (colours, fonts, spacing, brand) without building from scratch
- Easy maintenance and updates, without rebuilding your integration each time
- Teams who want more UX control than Hosted Pages, with less build effort than a fully custom API integration
Out of the box:
- Embedded UI mounted into any element on your page
- Built-in form validation, error states, and retry behaviour
- Prefill customer details from your existing flow
- Compliant mandate authorisation flow
If you need to collect a payment alongside the mandate, or need a scheme we don't yet cover, use Hosted Pages, Drop-in Flow, or Custom Payment Pages instead.
1. Setup#
You can skip to Implementation if you already have:
- An access token with
GoCardless Componentsenabled - A server with an endpoint capable of minting session tokens from that access token
- A server endpoint capable of fulfilling billing requests via the GoCardless API
1.1. Getting an access token#
The library authenticates via a short-lived session token, minted server-side from a long-lived access token.
For merchants#
Go to the /developers/access-tokens in the GoCardless dashboard:
- Enter a name to identify this token
- Select
Read-write accessscope - Turn "Enable GoCardless Components" ON for that token
- Provide the domain where you will use the component
- Click Create access token
For partner integrators#
Refer to the Partners page for detailed examples on how to mint a session token per merchant.
1.2. Setting up an endpoint to mint session tokens#
The library should never see your access token directly. Instead, your backend uses it to mint a short-lived session token, which is what gets passed to the library components. To do this, make the following request to GoCardless using the access token:
This returns a response of the form:
session_tokens.token is the value your sessionToken callback (see Configuring the Library) should resolve to.
Token rules#
- Mint one session token per checkout, don't share it across customers or checkout sessions.
- Don't cache it, always mint a fresh one from your
sessionTokencallback. This is also whysessionTokenis a() => Promise<string>callback rather than a static token string in the library's config — it's not possible to pass a fixed token, by design. - Tokens expire after 30 minutes absolute, or after 10 minutes idle. The idle timeout can't be observed or inferred.
If a request to the GoCardless API fails because the token has expired, the library automatically calls your sessionToken callback again and retries once, so your endpoint should be able to be called repeatedly throughout longer flows. A second consecutive failure is treated as unrecoverable and won't be retried again.
1.3. Setting up a fulfilment endpoint#
When a payer completes the Components checkout flow, a callback signals that the billing request is ready to fulfil. You are responsible for calling POST /billing_requests/{billing_request_id}/actions/fulfil from your server at that point.
See the API reference for full details.
Example fulfilment endpoint in Ruby:
2. Implementation#
2.1. Add the library to your project#
Add the GoCardless Components library:
Loading this script attaches GcComponents to the global window object — this is what you'll use in the next step to configure the library.
2.2. Configure the Library#
Initialise the library with GcComponents.init(...), passing the configuration:
| Property | Description | Required |
|---|---|---|
environment | The environment in which you want to use Components (local, live, sandbox, live-staging or sandbox-staging). | Yes |
sessionToken | A callback returning a fresh session token (see Setting up an endpoint to mint session tokens) | Yes |
appearance | Custom appearance configuration, applied to every component (see Customisation) | No |
enableAnalytics | Whether to enable analytics tracking. Defaults to true. | No |
onEvent | Callback invoked for every public event emitted by a mounted component (see Handling errors and events) | No |
onError | Fallback error callback for any mounted component that doesn't define its own onError | No |
locale | The target language and region for regionalization, with supported values including en-GB, en-US, fr-FR, de-DE es-ES it-IT nl-NL and pt-PT. Default: en-GB | No |
2.3. Create a Billing Request Component#
Select a mount target#
Create a <div> where you want the component to appear:
Initialise component#
| Property | Description | Required |
|---|---|---|
| schemes | The payment schemes to enable, as an array (e.g. [Scheme.Bacs]); currently only bacs and sepa are supported | No |
| creditorId | ID of the creditor to create the billing request under | No |
| prefilledCustomer | Prefills the customer/billing details form (see below) | No |
| appearance | Custom appearance configuration, merged on top of the top-level appearance | No |
| onReadyToFulfil | (billingRequestId: string) => void — called once the customer has submitted everything needed to fulfil the billing request | Yes |
| onError | (error: GoCardlessError) => void — called on error, in addition to the event bus | No |
3. Testing#
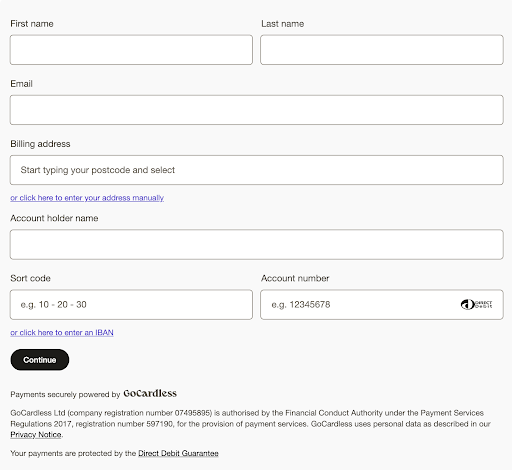
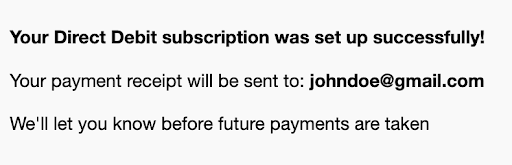
Run through the checkout flow end to end and confirm you reach the confirmation screen without errors. Then verify the mandate was created via the GoCardless dashboard or API.
4. Customisation#
Pass an appearance object in your config to match Components to your brand:
Components can be customised to fit the UI of your page. This is done through the appearance object, either globally in GcComponents.init(...), or per-component, where it's merged on top of the global one.
You can modify colours, fonts, borders, padding etc. and set customisation on particular element types. All unset variables fall back to GoCardless defaults.
Full default theme:
5. Handling errors and events#
Each component's public events are forwarded to the single top-level onEvent callback.
Errors are reported via onError, either on the component config or as a top-level fallback in GcComponents.init(...).
5.1 Troubleshooting errors#
Errors are reported as a GoCardlessError object of the following shape:
code— an HTTP-style status codemessage— a human-readable descriptionisUnrecoverable— whether the checkout flow can continue after this error, or must be restartedtype/requestId/errors— optional, populated for errors returned by the GoCardless API
5.2 Common errors#
- Billing request creation failed — the creation of a new billing request failed. Your session token may have expired or be invalid.
- Scheme not supported — you have attempted to use a scheme that Components does not currently support. Ensure
schemesonly contains values from the enumScheme. - HTML element not found — the library was unable to find the element in which to embed the component using your provided
targetselector. Ensure your selector is valid and present in the DOM before callinginit(...).
5.3 Session token expiry#
If a request to the GoCardless API fails because the session token has expired, the library automatically calls your sessionToken callback again to mint a fresh token and retries the request once. If the retry also fails, the error is marked as unrecoverable and the component will prompt the customer to restart the flow.
5.4 Checkout errors#
When an error occurs during the flow, GoCardless renders an error screen and calls your onError callback with a GoCardlessError object:
| Field | Description |
|---|---|
type | Error type |
message | Detailed error message |
metadata | subType, requestId, statusCode |
isUnrecoverableError | true if GoCardless could not offer a retry — provide the payer a way to exit |
| Error | Description |
|---|---|
TimeoutError | onReadyToFulfil was triggered but the request was not fulfilled within 10 seconds. GoCardless cancels the request and offers a retry |
Authentication (with SessionTokenExpired) | Session tokens are valid for 30 minutes. If the token expires mid-flow, the payer must restart |
6. Prefilled customer details#
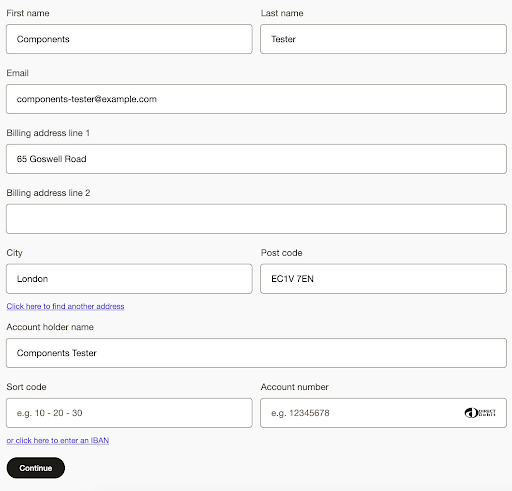
Pass prefilledCustomer in your BillingRequest factory to pre-populate the billing form. Bank details cannot be prefilled for security reasons.
7. Analytics and data tracking#
GoCardless Components collects usage data to improve performance and usability. Data collection is enabled by default and can be disabled:
| Purpose | Service | Cookies | Description |
|---|---|---|---|
| Analytics | GoCardless / Segment | ajs_anonymous_id, analytics_session_id, analytics_session_id.last_access | Tracks user events (clicks, form interactions) to improve UX. Processed via Segment |
As an integrator, you are responsible for obtaining user consent for data collection, disclosing GoCardless and Segment as third parties, and updating your cookie policy accordingly.
What's next?#
Learn how to collect bank account details and create mandates via the API.
Compare all integration options to find the right fit for your use case.
The fastest integration — redirect to a GoCardless-hosted checkout.
Full API control for teams that want complete UX ownership.