Before your users can actually start collecting payments and getting their payouts, their GoCardless account needs to be verified. This is a must-do for anti-money laundering (AML) rules.
The verification process is pretty straightforward, but it asks your users to:
Provide detailed information about their business
Upload proof of identity and address
Add their bank account details and prove ownership of the account
We collect these details in a verification flow inside the GoCardless dashboard. Once a user signs up to GoCardless through your app, you should immediately check their verification status and send them to this flow if they need to complete it.
Once a user completes the OAuth flow and you have an access token, you need to find out if the user needs to go through the verification process. Most new users will, but some might be connecting an existing, verified account.
You can find your user's verification status in the Creditors API using the verification_status attribute. You can query it like this:
<?phprequire 'vendor/autoload.php';$client = new \GoCardlessPro\Client([ 'access_token' => $currentUser->gocardlessAccessToken, 'environment' => \GoCardlessPro\Environment::SANDBOX]);// The Creditors API returns a list of creditors, but any GoCardless account connected// to your application will have a single creditor, so you can just look at the first one$creditor = $client->creditors()->list()->records[0];// We'll see below how to redirect users to the onboarding flow, and how it worksif ($creditor->verification_status == "action_required") { redirectToOnboardingFlow();}
import gocardless_proclient = gocardless_pro.Client( access_token=current_user.gocardless_access_token, environment='sandbox')# The Creditors API returns a list of creditors, but any GoCardless account connected# to your application will have a single creditor, so you can just look at the first onecreditor = client.creditors.list().records[0];# We'll see below how to redirect users to the onboarding flow, and how it worksif creditor.verification_status == "action_required": redirect_to_onboarding_flow()
require 'gocardless_pro'client = GoCardlessPro::Client.new( access_token: current_user.gocardless_access_token, environment: :sandbox)# The Creditors API returns a list of creditors, but any GoCardless account connected# to your application will have a single creditor, so you can just look at the first onecreditor = client.creditors.list.records.first# We'll see below how to redirect users to the onboarding flow, and how it worksredirect_to_onboarding_flow if creditor.verification_status == "action_required"
package com.gcintegration;import com.gocardless.GoCardlessClient;import com.gocardless.resources.Creditor;import static com.gocardless.resources.Creditor.VerificationStatus.ACTION_REQUIRED;GoCardlessClient client = GoCardlessClient .newBuilder(CurrentUser.gocardlessAccessToken) .withEnvironment(GoCardlessClient.Environment.SANDBOX) .build();// The Creditors API returns a list of creditors, but any GoCardless account connected// to your application will have a single creditor, so you can just look at the first oneCreditor creditor = client.creditors().list().execute().getItems().get(0);// We'll see below how to redirect users to the onboarding flow, and how it worksif (creditor.getVerificationStatus() == ACTION_REQUIRED) { redirectToOnboardingFlow();}
const client = gocardless( // We recommend storing your access token in an environment // variable for security process.env.GoCardlessAccessToken, // Change me to constants.Environments.Live when you're ready to go live constants.Environments.Sandbox,);const creditors = gocardless.creditors.list({ limit: 1 });// The Creditors API returns a list of creditors, but any GoCardless account connected// to your application will have a single creditor, so you can just look at the first oneconst creditor = creditors.creditors[0];if (creditor.verification_status === "action_required") { // We'll see below how to redirect users to the onboarding flow, and how it works redirectUserToOnboardingFlow();}
GoCardlessClient client = GoCardlessClient.Create( // We recommend storing your access token in an // configuration setting for security ConfigurationManager.AppSettings["GoCardlessAccessToken"], // Change me to LIVE when you're ready to go live GoCardlessClient.Environment.SANDBOX);var creditorListResponse = await gocardless.Creditors.ListAsync( new GoCardless.Services.CreditorListRequest() { Limit = 1 });// The Creditors API returns a list of creditors, but any GoCardless account connected// to your application will have a single creditor, so you can just look at the first oneGoCardless.Resources.Creditor creditor = creditorListResponse.Creditors[0];if (creditor.VerificationStatus == CreditorVerificationStatus.ActionRequired){ // We'll see below how to redirect users to the onboarding flow, and how it works RedirectUserToOnboardingFlow();}
package mainimport ( "context" "fmt" gocardless "github.com/gocardless/gocardless-pro-go/v6")func main() { accessToken := "your_access_token_here" opts := gocardless.WithEndpoint(gocardless.SandboxEndpoint) client, err := gocardless.New(accessToken, opts) if err != nil { fmt.Println("error in initialisating client: %s", err.Err()) return } creditorListParams := gocardless.CreditorListParams{} creditorListParams.Limit = 1 ctx := context.TODO() creditors, err := client.Creditors.List(ctx, creditorListParams) if err != nil { fmt.Printf("error in fetching creditors: %s", err.Error()) } // The Creditors API returns a list of creditors, but any GoCardless account connected // to your application will have a single creditor, so you can just look at the first one creditor := creditors[0] if creditor.VerficationStatus == "action_required" { // We'll see below how to redirect users to the onboarding flow, and how it works redirectUserToOnboardingFlow() }}
Tip
You probably won't want to poll the Creditors API on every page load for your user's
verification_status. We'd recommend caching this and refreshing it regularly, as well as at
times when it makes sense in your user journey (for example when a user returns to your app
through the post_onboarding_url).
A creditor's verification status will be one of these three values:
Nothing. They can collect payments and receive payouts!
in_review
They have sent all required information, and GoCardless is reviewing it.
They can't collect or get payouts yet. Do not redirect them. Just show a message letting them know it's being reviewed.
action_required
We need more information to complete their verification.
You should immediately redirect them to the dedicated onboarding flow.
Users might revert back to in_review or action_required even after being successful (like if they change their bank account). Always check the status before allowing payment or payout features.
We highly suggest adding clear messages in your UI if they are not successful (telling them why they can't collect/get paid) and pointing them to the onboarding flow if they're in action_required.
There, the user fills in the details about themselves, their business and their bank account. When they finish, they aren't sent back to your product automatically. For how they get back, see sending merchants to your app.
Once a merchant connects their account, there are three ways they might make their way back to your platform:
When
URL
What happens
After connecting
redirect_uri
We send them here straight after they connect their account through OAuth, whether or not they're verified. You pass it in the OAuth link, and it must match one of the redirect URLs in your app settings.
After verification
post_onboarding_url
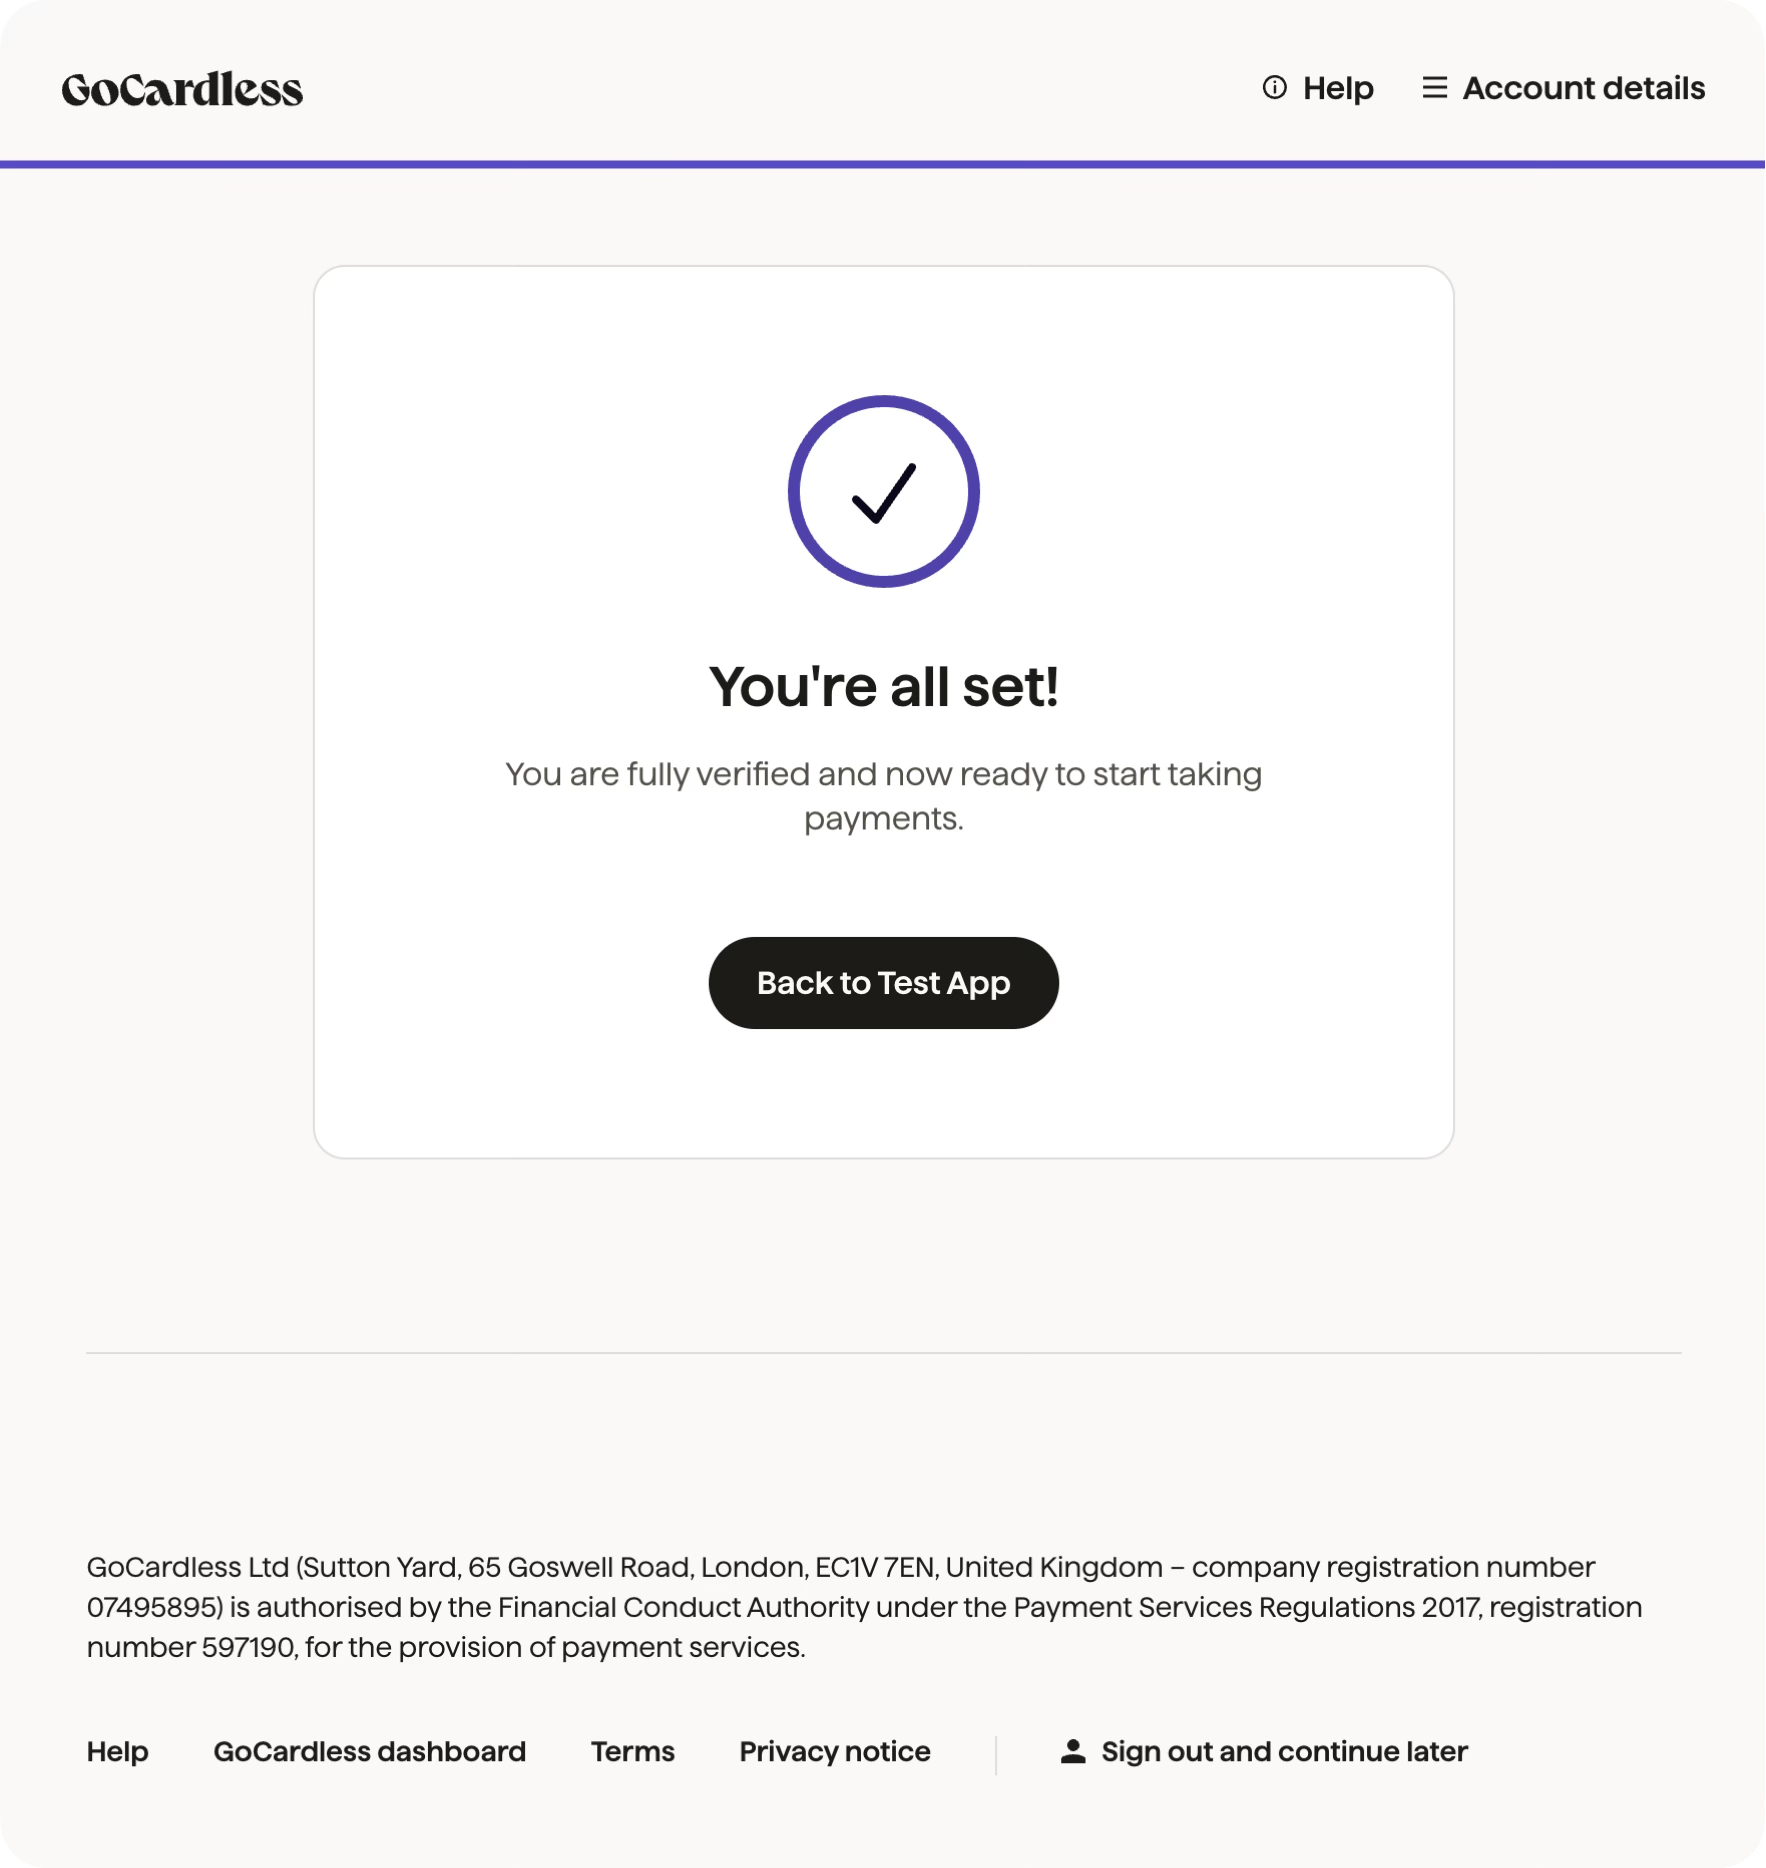
The last verification screen shows a "Back to [your app]" button that links here. The button only shows if they're connected to just your app.
From the GoCardless dashboard
payment_setup_url
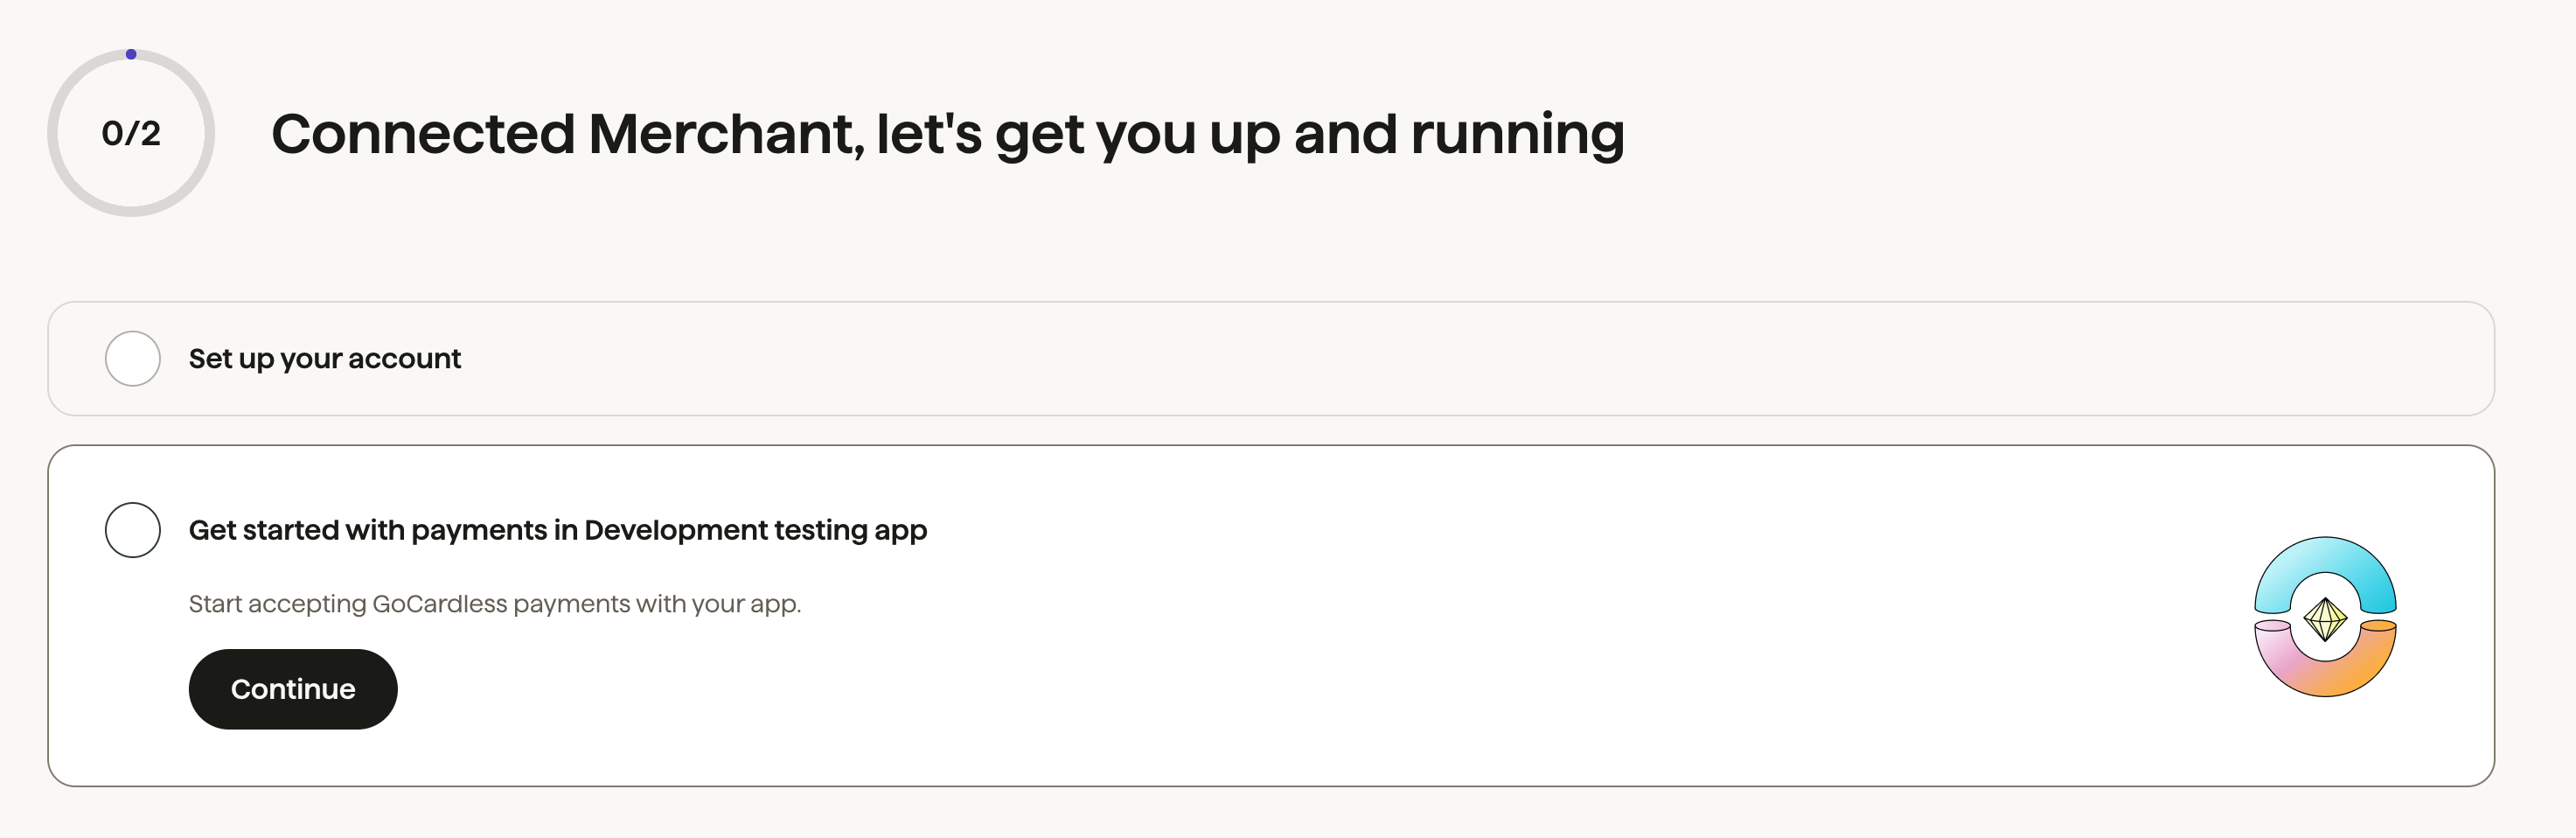
Until they've taken a payment, their dashboard shows a "Get started with payments" step. Set it to link to the page in your product where they start creating mandates and payments.
You set these URLs in your app settings, when you create or edit your app. If you leave payment_setup_url empty, we use your post_onboarding_url. If that's empty too, we use your website_url.
The "Back to [your app]" button links to your post_onboarding_url:
The "Get started with payments" step links to your payment_setup_url:
When your user lands back in your product, it's likely that their verification status will not yet be successful. Some of the information provided by users requires review by GoCardless, so it may be a little while before they move to the successful state. Or in some cases, further information will be requested, meaning they'll move back to action_required.
Tip
Spot unverified merchants at a glance
The Partner Dashboard surfaces each merchant's verification
status in the Connected Merchants list, so you can see who still needs to complete onboarding.
Click "Switch to Partner View" in the side nav to access it.